Homemade paper light fixtures - choice of material and design
The article will tell you how to make a lamp out of paper with your own hands. Step by step instructions are given on how to make many kinds of paper lamps, even the most original. As a supplement - useful recommendations on how not to make mistakes in working with paper.
Pros of paper homemade lights
The main reason for installing a paper lamp is the same as for other types of lights - your own preferences. In favor of this not the most obvious choice are such advantages:
- Originality. First, it is a stylish and unusual solution.
- The paper "softens" the light. We get a diffused unobtrusive lighting, which does not hurt the eyes and does not tire, creating a relaxed atmosphere.
- A huge field for design options - there are dozens of them.
- Low cost of consumables. In fact, you only have to spend money on paper; the rest depends on your hands.
- A paper light can be both the main lighting of a room and part of the supplementary lighting.
- They can be hung on walls as sconces.
Chandelier options
From rice paper or parchment paper.
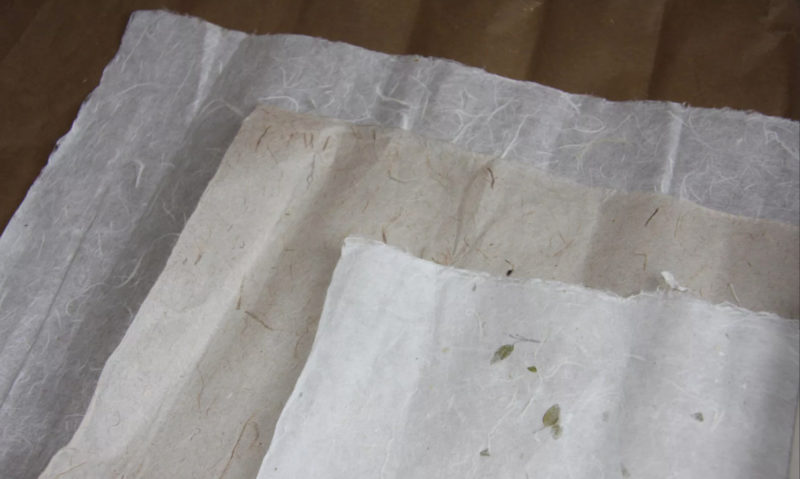
To make such a lamp, you need to take an old unwanted lampshade or buy a new one, and remove the coating from it. Next, the technology is as follows:
- Cut rice paper or parchment paper into rectangles of equal size.
- Smooth them with an iron.
- Then each of the rectangles to fold an accordion, and cut out as many circles as possible.
- All of them should be connected by threading through the hole in the center.
- Wrap this "necklace" lampshade around the circle around the entire height.
Origami
To make an origami paper light fixture, you need to own this technique at least at a basic level. Need two paper bags, preferably with a pattern. They have to cut the bottom and handles, then glue them together. The resulting large bag is folded in half, and each part is made an accordion of 16 strips.
The outermost strips should be folded diagonally, then make a hole with an awl, and use thread to fix one side. The other side will remain open. To the chuck to bring the thread for hanging on the frame. For origami lamp is suitable only for LED-lamps.
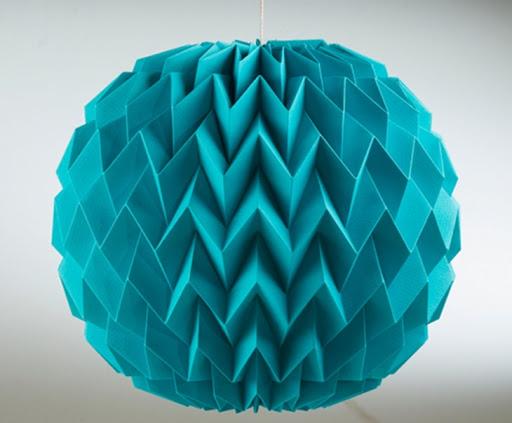
From corrugated paper (crepe)
Thanks to the original type of material, lamps from corrugated paper (or crepe) have so many fans. To make it, you first need to carefully mark the paper lines of equal width, then along these lines to make an accordion. Next order is this:
- Take a needle and fold an accordion diagonally at one end.
- Return the accordion to its original position and fold in the same way at the other end.
- Make folds on the corrugated paper so that you get rhombuses.
- Finally, twist the composition into a ball, fix the top with a firm thread.
Paper butterflies
There are two kinds of such crafts: with one large butterfly or with a flock of small ones. The second option will be more original, because there will be dozens of winged paper insects hanging under the chandelier. You need the base - the frame of an old lampshade or any metal or wooden rim. You will also need sheets with ready-made templates of butterflies or your own blanks. It is advised to make 5-10 different sizes.
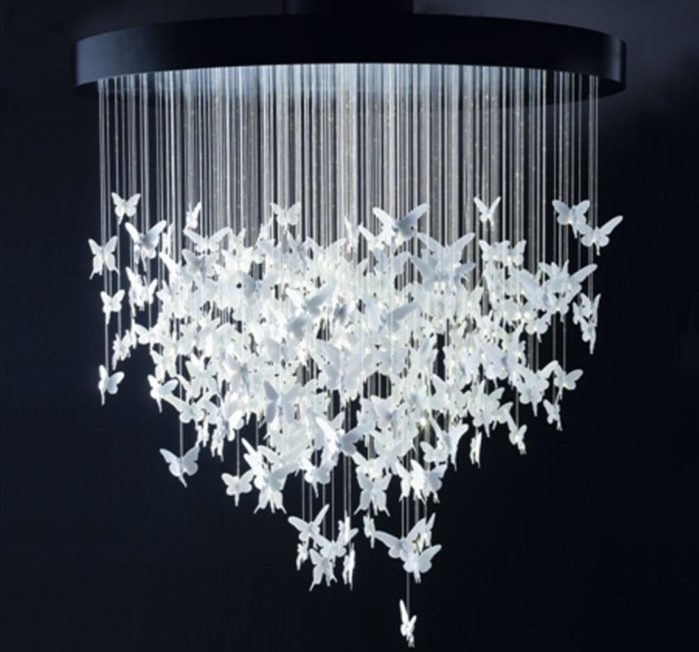
Only well-sharpened scissors and high-density paper are suitable for cutting. Each butterfly is securely attached to a thread and fastened to the base. If desired, they can be painted in different colors.
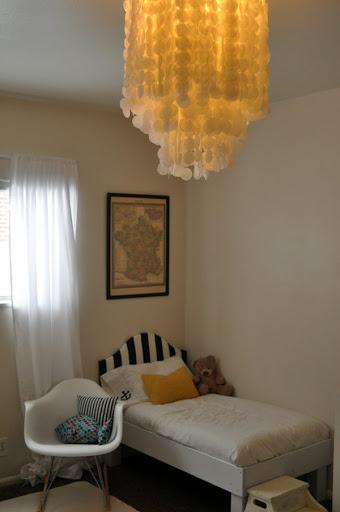
Luminaire made of circles of waxed paper
Here is the scheme:
- Take several layers of wax paper.
- Iron them with an iron on minimum heat.
- Fold in even lines into an accordion.
- Squeeze the accordion, and use a round hole punch to cut out identical circles.
- String the circles on the threads. The threads will hang down, so do not make them too long.
- Fix the threads to the frame of the lampshade. You get the lamp, like a big jellyfish.
Chandelier in the form of a ball
It is necessary to cut out circles from square sheets of paper. Then they are all joined, and the edges are lifted to make a flower. Instead of circles there can be squares, which should be turned into cones. The finished compositions are fixed on the lamp in the form of a Chinese ball.
Chinese lanterns

This is one of the most popular types of paper lantern designs. To make it, you will need plain, or better, rice paper, a lamp socket, and the bulb itself. So that the paper does not overheat, it is worth preferring an LED lamp.
The manufacturing algorithm is as follows:
- Mark out the paper so that in certain places it is bent accordion. Marking with small rhombuses will help.
- Fold the paper exactly along the lines.
- Screw the bulb into the socket.
- Make a hole in the bottom of the socket with an awl and drag a thread through it, preferably from satin ribbon.
- Attach the thread to a fixed frame.
- Wrap a paper lampshade over the cartridge, glue or overlap its edges.
Idea. To make the lantern really "Chinese", you can paint the lampshade authentic Asian patterns, hieroglyphs.
Video lesson: How to make a lantern lumi.
Japanese lantern
The basis of the lamp "under Japan" will be rice paper and bamboo sticks for fixing. Step by step instructions:
- Grind the sticks with sandpaper, cut to the right height (by "right" we mean the height of the entire lamp).
- Mark out gluing points on the sticks.
- Glue all the slats into one square or round construction. The corners can be fixed with strong string for security.
- The lid will be a sheet of MDF. It is necessary to make a hole in it for the cartridge.
- To preserve the "life" of the tree longer and to protect it from insects, the laths should be treated with a stain.
- Glue the paper sheets to the frame. In order to have a Japanese flavor they can be painted with patterns or hieroglyphs.
If the Japanese lamp is designed correctly, it will last a long time.
A more advanced version of a Japanese-style lamp.
Lamp in the style of minimalism
For a room in the style of minimalism, a chandelier made of paper with a plafond without any frills will do. Square or round shape - not important. There should be no inscriptions, drawings, other decorations. It is desirable that it was the usual white plafond.
Variants of lighting fixtures
Tubes
One of the most original, non-standard solutions for the design of the room. Lampshade, made of paper tubes, will give a soft romantic light. Such a lampshade looks good on any lamp: chandelier, floor lamplamp, sconces. Tubes can be twisted from white or colored paper, or from ordinary newspapers, but you must remember one thing.
The appearance and color of the tubes of lampshade should organically complement the design of the room, but not conflict with it.
The minimum number of tubes is a hundred. For a large lamp, you may need to make them more. The tubes are glued to each other with glue in the desired shape - round, square, oval, etc. Closer to the center of the design should expand, with the distance from the center - to narrow.
From the video learn how to make a simple table lamp of tubes.
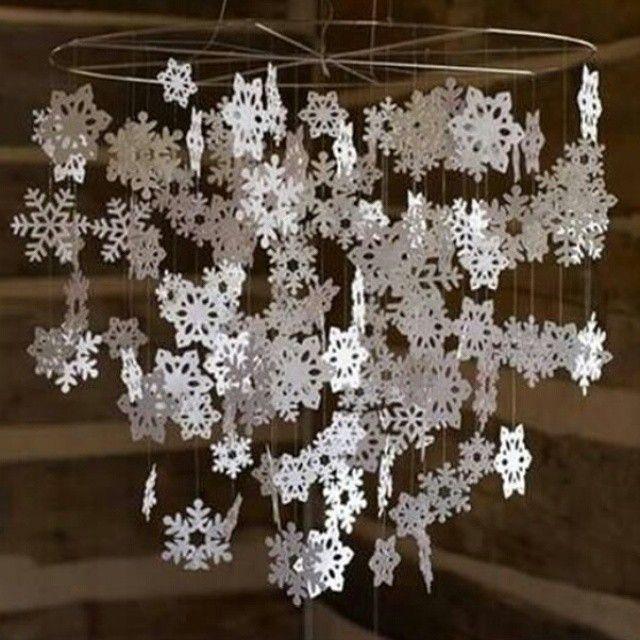
For New Year
To add a New Year's mood to the interior, you can thread the old lampshade row by row, on which the snowflakes are fixed, or hang a lot of vertical threads. There are hundreds of options for paper snowflakes.
Cardboard polyhedron
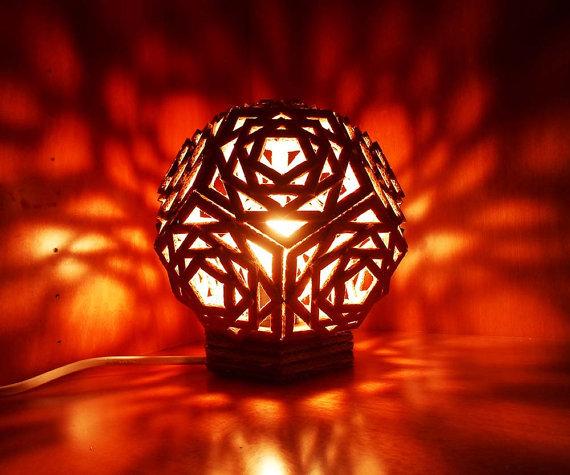
A chandelier made of cardboard in the form of a twelve facet looks very original. Do it this way:
- Draw 11 identical pentagons on cardboard. It is better to use one stencil.
- Inside each pentagon draw 5 more at the same distance from each other.
- Carefully cut out these five figures.
- Glue them together so that each corner of one figure falls to the middle of the other. It will look like a star.
- Then all 11 of these "stars" are glued to each other with PVA glue, and a beautiful twelve-sided pancake is ready.
- For the bottom face and base of the cartridge 5 pentagons should be glued one side to the other.
In this video lesson we will learn how to build a regular polyhedron with a ruler and a compass.
Lamp-Moon
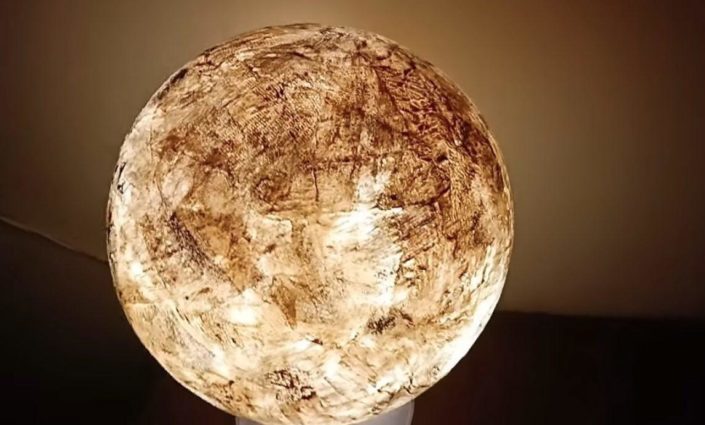
Now about how to make a lamp out of paper in the form of the moon with your own hands:
- Inflate a balloon.
- Draw a circle near the node with a marker.
- Completely dip the balloon into the mixture of glue and water.
- Brush a lot of paper towels on the balloon and let dry.
- Apply a few more layers of towels.
- When the balloon dries, paint the paper with acrylic paint in a soft light shade (beige, cream, ivory).
- With a coarse sponge, apply ochre paint over the entire surface. Apply different pressure to get darker and lighter areas.
- Carefully cut the paper along the circle outlined by the marker, and use tweezers to take the ball through it.
- Place a cartridge inside or hang the "moon" as a lampshade.
Master class: homemade lantern moon.
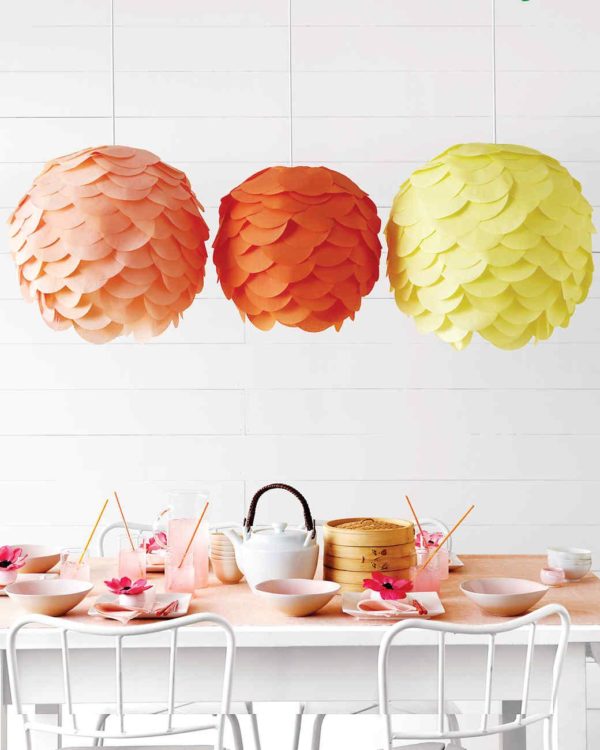
Bright lanterns from paper circles
Very popular now kitchen lanterns with a lampshade made of brightly colored paper disks - orange, yellow, lettuce. For this purpose, discs of equal diameter are cut out of colored paper with a round hole punch. Then these disks are neatly glued to the Chinese ball suspended from the bottom to the top with PVA. It looks like exotic fish scales.
Do not forget about the kids
The smallest inhabitants of the house will please the original paper lamps based on favorite characters from fairy tales and cartoons, animals, flowers. You will need corrugated paper or papier-mache. The basis of the character will be a frame of wire. It is glued with several layers of paper, then it is painted to give a gentle doll or a brave superhero familiar features.
Useful video: 17 magical homemade lamps.
Recommendations
In conclusion - a few useful tips that will help not to make mistakes during the manufacture of a paper lamp, as well as "prolong the life" of the lantern:
- The most important thing about paper is the thickness. Too thin will be brittle, thick will absorb a lot of light.
- All markings should be made as accurately as possible, to the millimeter.
- The compositions should be cut very carefully, according to clear templates.
- There should not be much glue for each element.
- Try not to use lamps other than LEDs. This way the paper is guaranteed not to catch fire.
Do not limit your imagination. Paper gives a huge field for the realization of bright ideas.