How to make your own footlights in the car
The article gives detailed information on how to install and connect the foot lights in the car. Various connection options are given with step-by-step instructions for the work, and a recommended connection diagram is offered at the end.
Connection options
There are two options:
- Auto-Lighting turns on the moment the doors are opened. The tuning system is already built into the bottom of the door, and directs the light to the foot area when you open it. As a rule, this is the default method of illumination, installed at the car factory. The practicality of this option is very low.
![How to make your own LED footlight in the car]() The illumination works with the door open.
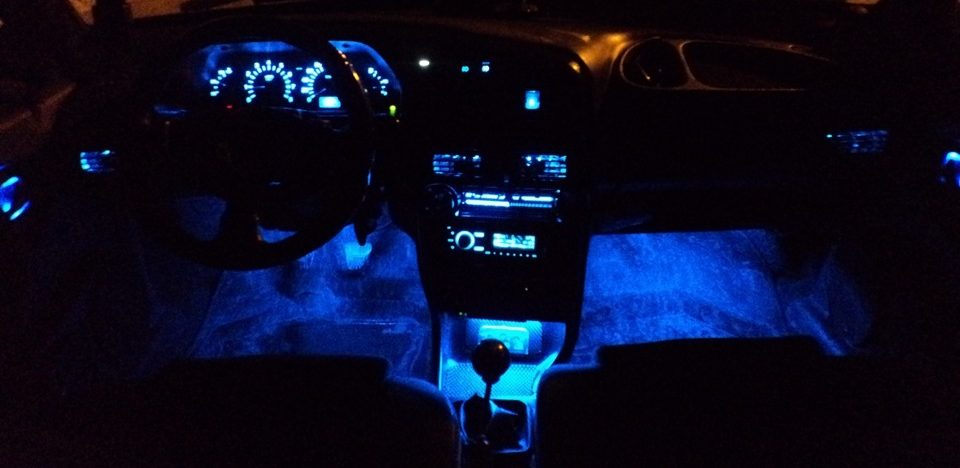
The illumination works with the door open. - Illumination without doors. Specially mounted lighting system, which gives a directional flow to the pedal area. This can look more spectacular than the first option, and the superiority in terms of usefulness is undoubted. Additional light in the cabin in the dark time of day is not superfluous, and such tuning will always help the drivers-beginners not to get confused in the pedals.
![How to make your own LED footlight in the car]() Automatic illumination of legs is not only an element of decor, but also a practical benefit.
Automatic illumination of legs is not only an element of decor, but also a practical benefit.

Choosing the lighting equipment
To perform illumination of the feet in the car with their own hands use one of two varieties of lighting:
- LED (LED) strip.. The more common type. Inexpensive, easy to install, available in a wide range.
- Neon cord. Potentially such a light looks prettier, more spectacular and more natural than LEDs. But this is where the advantages end, and of the disadvantages - the higher cost and the impossibility of installation without an ignition unit. That is, you will need to interfere with the electrical system of the car.

Zones of placement and direction of the light flux
Along with the choice of lighting equipment for tuning, it is worth determining how exactly it will be located in the cabin. Here are possible options:
- only in the driver's area;
- at the feet of the driver and passenger;
- near the feet of all the people sitting in the car, including the back row.
The chosen method directly depends on the length of the LED strip or neon cord, which will need to buy.

To ensure that the light strip performed its direct function, and not glare, it must be competently placed and hide the unused areas. To do this, three zones are used:
- around the perimeter at the bottom of the front driver's or passenger's seat;
- at the bottom of the dashboard;
- under the glove compartment.
Basically, it depends on personal wishes and design nuances of the car.
The main thing to keep in mind - the lighting must "look" strictly to the floor, not up. Many people mistakenly mount lighting directly on the floor covering, and over time, the light begins to interfere, blind the eyes. This type of tuning is created to illuminate a strictly defined area.
Choose a method of connection
Drivers use one of the three main methods of connecting the footlights:
- to the car's general lighting system;
- to the cigarette lighter;
- to the parking lights.
Now - more details about each method.
To lighting.
With this variant of installation tuning of the foot area will be turned on every time the doors are opened, as well as at the time of turning on the interior lighting. The installation itself follows the following algorithm:
- Remove the lighting plafond. It can be screwed with fasteners, mounted on snaps. To remove the plafond sometimes you need auxiliary devices.
- Connect the LED or neon strip wires to the corresponding pins of the plafond. As a rule, the red wires are "minus" and the white wires are "plus". But it is still better to check each contact with a multimeter or a tester.
- The wiring is hidden under the interior trim. The most reliable way is to run the harnesses along the side pillar.
- The next step is to connect the contacts of the light strips in the driver's and/or passenger's feet area.
- Connect the connected pieces to the interior light source.
- Check the entire system for proper operation. Only then can all connections be insulated.
- Put the plafond in place.

An option to improve this method is to install an additional controller. Due to it, the backlight will not go out in one moment, but slowly goes out.
To the cigarette lighter
Another widely used method of connection - from the car cigarette lighter. Here the light will turn on when the doors are opened. This is A convenient variant for drivers who do not need backlighting while driving.. It is engaged only when boarding and disembarking from the car.
Wiring procedure:
- "Plus" contact of the LED or neon strip is led to the cigarette lighter.
- "Minus" is connected to the door limit switch.
- The wires of the light strip are led out in one bundle with the rest of the harnesses that go to the door.
- All connections are securely insulated, if necessary - fixed with a coupler.
The nuances of the output and routing of cables depend on the specific car model.

To lights.
Unlike the previous two ways, this one means the footlights work together with parking lights. Such tuning will help during the trip in the dark. If the constant operation of the backlight is not needed, the system should be equipped with an additional switch. The connection principle is simple. The plus output of the LED strip is energized to any of the backlight bulbs - for example, in the glove compartment or on the dashboard. The same minus is given to the body or, alternatively, to the door limit switch.
When connected to a door sensor, the light will only come on when the door is open and the lights are on.

Video: Installing RGB lights for 250r on the Lada Kalina.
Preparing the tools
To perform a standard, without additional elements, installation and connection of the foot area lights in the car requires a number of handy tools:
- Light source - LED or neon strip;
- long wires, preferably not less than 5 m;
- Heat shrink tubing;
- Strong glue, "Moment" will do;
- pliers;
- 220V soldering iron;
- Screwdriver for fixing the light fixture;
- a sharp box cutter.
This is the minimum set of tools. To make additional options for the leg lights in the car, you will need:
- a switch;
- brightness controller;
- remote control.
Illumination installation
First, you need to install the tape in the selected areas of the salon, is performed as follows:
- Mark out the boundaries of the areas along which the strip will run.
- Cut the LED strip into fragments of the required length. Make the cuts only along the special lines between the contact pads. It is not difficult to find them.
- To the edges of each piece it is necessary solder a wire.
- After that, the strip is tested by connecting it to a power source.
- If the light in the strip turned on, then all is good and you can continue.
- All soldering points of the tape fragments and wires are insulated with heat shrink tubing. It is recommended to preheat it. A brief exposure to a soldering iron or a lighter is enough.
- After isolation, the light strip is mounted at the planned points in the foot area. For fixation strip is most often used glue. Other options are strong double-sided tape or silicone ties.
- If you need to illuminate the areas near the front passenger seat or the back row, the entire process of mounting the tape is repeated.

Recommended mounting scheme
As a conclusion. If we set aside the tastes and wishes of the car owner, the more preferred option of lighting equipment is LED strip. LED is cheaper and easier to install. As for the method of connection, the activation of the lighting system and the cigarette lighter provides for the activation of leg lights only when you open the doors. But the connection to the parking lights will ensure the tuning throughout the trip in the dark. In addition, the wiring scheme itself is simpler. The recommended variant of lighting for the legs in the car - LED strip connected to the parking lights.