Energy saving bulb circuit description
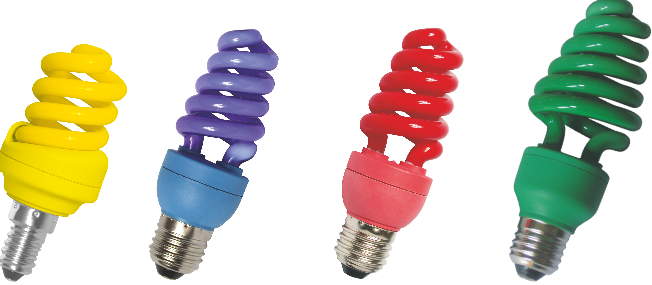
Household energy-saving lamps (ESL) are in demand today, despite the popularity of LED lights. This is due to their convenience, reliability and efficiency. Lamps are available in different wattages from 20 W to 105 W. To use was comfortable, we recommend to study their device, which has its own specifics.
Composition and principle of operation
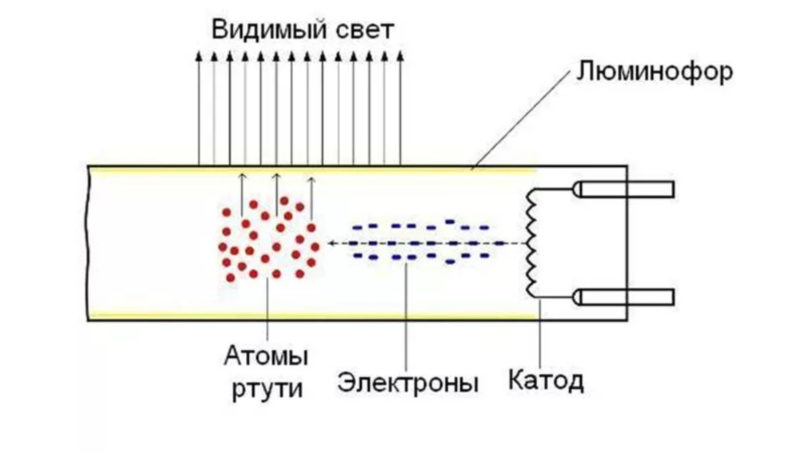
Any gas discharge energy-saving lamp consists of a glass bulb with an inert gas or mercury vapor inside. There are two electrodes inside the bulb, to which the mains voltage is applied.

The principle of operation is as follows: the current causes the heating of the electrodes. An arc discharge occurs between the electrodes. The process is controlled control gear (ECG), an electronic circuit with transistors and capacitors.
The arc discharge between the electrodes affects the mercury vapor inside the bulb and causes ultraviolet radiation. It is invisible to the eye, so the inner walls of the bulb are covered with phosphor. Passing through the phosphor, the ultraviolet radiation turns into white light of the visible spectrum. The specific shade and temperature of luminescence depends on the composition of the phosphor. The choice of coating affects the cost.
Energy-saving lamps provide a higher light output than traditional incandescent devices.
The main disadvantage of energy saving lamps is that they cannot impossible to connect 220 V directly to the mains. Mercury vapor has a high resistance, and a high-voltage pulse is required to form the desired discharge.
The resistance inside the bulb becomes negative at the moment of discharge. If no protective elements are provided in the circuit, a short circuit is inevitable. The protective function in tubular systems is performed by an old-style electromagnetic ballast, which is mounted directly in the lamp.
In today's compact ESLs, the electromagnetic ballast has been replaced by a small electronic ballast circuit. The longevity and efficiency of the entire design depends on the quality of the ballast.

Schematic diagram of an energy-saving lamp
The circuit includes:
- A starting capacitor that supplies the pulse;
- a set of filters to smooth out pulsations and eliminate interference;
- choke to protect the circuit from current surges;
- transistors;
- current limiting driver;
- fuse, excluding circuit ignition in case of mains voltage surges.

A current pulse is generated in the driver module, arrives at the transistor, and opens it. The capacitor is charged. The charging rate depends on the circuit components.
From the transistor key the pulses are transmitted to the step-down transformer, then the pulse voltage through the resonant circuit goes to the electrodes.
A glow is formed in the tube, the parameters of which depend on the capacitor. The triggering pulse voltage of about 600 V requires a protective system.
After the breakdown of the electrodes the shunt capacitor sharply reduces the resonance and puts the device in the operating mode with a uniform stable glow.
Should the circuit be changed
The energy-saving bulb scheme does not need to be improved or refined. The changes concern repairs malfunctions.
If the device does not turn on, you can try to repair it yourself. The lamp base is disassembled and the circuitry is removed. First the visible faults are repaired, then a tester test follows.

A common cause of failure is a blown fuse. It can be seen with the naked eye. On the circuit there will be a darkened element with signs of burning. Desolder the component and replace it.
Separately consider the filament of the bulb. To check, you need to unsolder one lead from each edge and measure the resistance with a tester. The reading should be the same. If the filament is burned out, you need to solder a resistor with a suitable resistance to the parallel coil. After that, the lamp should work.
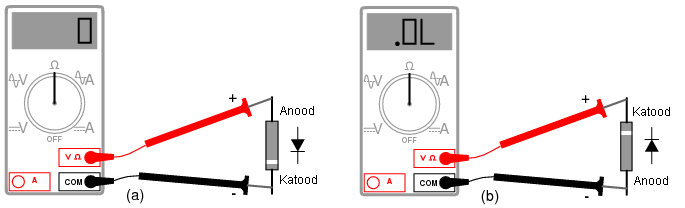
Transistors, capacitors, diodes and other elements on the circuit are checked with a multimeter. Severe system overloads can cause short circuits in some components. You need to identify such a node and resolder the part.
Suggestions for use
Energy-saving lamps are convenient and virtually unrestrictedly used in lighting equipment. However, the operation must be carried out according to the rules in order to avoid costs and losses.
It is mandatory to consider the temperature range of a particular device. It is specified in the specification. The lamp should not be exposed to fluctuations outside of the specified range.
The video is dedicated to a detailed disassembly of the circuit and a simple repair method
In electrical circuits with energy-saving lamps, do not use stabilizers and soft starters designed for simple incandescent lamps. These components do not meet the capabilities of gas-discharge devices.
During operation, it is important to observe the rule of warming up, which provides for turning off the device only after 5-10 minutes of operation. Sudden surges in voltage have a negative effect on the elements of the system.
It is not unreasonable to observe safety precautions when working with devices. Energy-saving lamps emit ultraviolet light, which is harmful to humans. Too high dose of radiation leads to premature skin aging, allergies, and sometimes provokes migraine attacks or epilepsy.
For this reason, gas discharge energy-saving lamps are best installed away from the place where a person permanently stays. Installing the device in a table lamp is definitely not a good idea.