Checking a light bulb with a tester
A light bulb that burns out - is not a pleasant experience, which leads to inconvenience and expense of new light sources. But far from always the malfunction of the lamp is caused by a broken element. Often the cause is failure of other circuit components, short circuits, or broken wiring. To avoid throwing away a serviceable component, a light bulb test is performed using a multimeter.
Do I have to check the light bulb?
Inspection of a light bulb is far from always an exact determination of the fault. Even in incandescent bulbs, in some cases, the tungsten filament remains in place without any damage. But at the same time, the device does not function in the right mode.

With LED or fluorescent lamps is even more difficult, because the internal parts of these elements are usually hidden by the opaque glass of the bulb. And even if they were visible, it would be difficult to determine the fault. But it is possible to detect a breakdown with the help of testers.
If there is a problem with a particular light fixture, it is easiest to unscrew the bulb from the socket and screw it into another light fixture. If it lights up, then the problem is in the light fixture. However, it is not always possible to carry out the procedure. It is not uncommon for apartments to have devices with specific bases that do not fit other sockets.
It will be useful to read: Why bulbs in a chandelier burst.
In good electrical stores, the salesperson always tests the bulbs with a tester before selling them. Especially for this purpose, they provide connectors for each type of bulb (incandescent, halogen, fluorescent and LED).

With the help of a tester, a specialist checks the integrity and serviceability of all the conductors inside the lamp. The test is accompanied by a characteristic signal. The same test can be carried out by any user at home. This will require a multimeter or screwdriver.
Checking a light bulb with a multimeter
A multimeter is a device with which you can measure various indicators of electrical circuits: voltage, current and resistance. It also has a continuity mode which is used to check the continuity of wires. With a multimeter you can quickly check any electrical equipment and pinpoint possible faults.

The easiest way to check a light bulb with a multimeter is to use the continuity test mode. It involves sequentially testing circuit elements for contact between them. The vast majority of multimeters have this mode built in by default. To activate it, the user needs to move the switch to the desired position. Usually there is a diode or buzzer icon opposite.
When connecting the probes, it is important to observe the correct connections. The black probe is inserted into the hole marked "COM" and the ground symbol. The red probe is placed in the hole marked "VΩmA".
The tips of the probes should be short-circuited and wait for the characteristic buzzer signal to appear. Zeros will appear on the screen at this moment, indicating that there is no extra resistance or breakage. An open circuit will give a value of "1".
Checking a Bulb with a Tester
You can check a light bulb with a diode tester in either the "Ringing" or "Resistance" mode. Both methods are able to provide the necessary information about the state of the electrical appliance and help identify the problem.
Probing Mode
This mode is available in all multimeters. It can be found on the panel by its characteristic symbol.

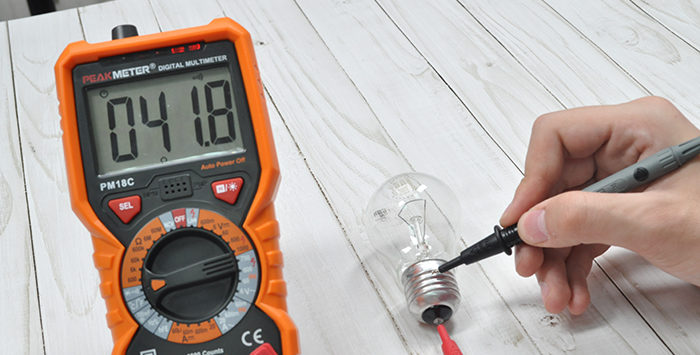
One probe of the device is applied to the central contact of the lamp, the other to the side contact (for sources with a threaded base). If the instrument uses a pin base, you will simply need to attach the meters to the appropriate pins.
If the lamp is good, you will hear a beep and the value on the display will be between 3 and 200 ohms.
Before testing the lamp it is recommended to short-circuit the contacts of the probes. This is how the meter module of the tester is tested.
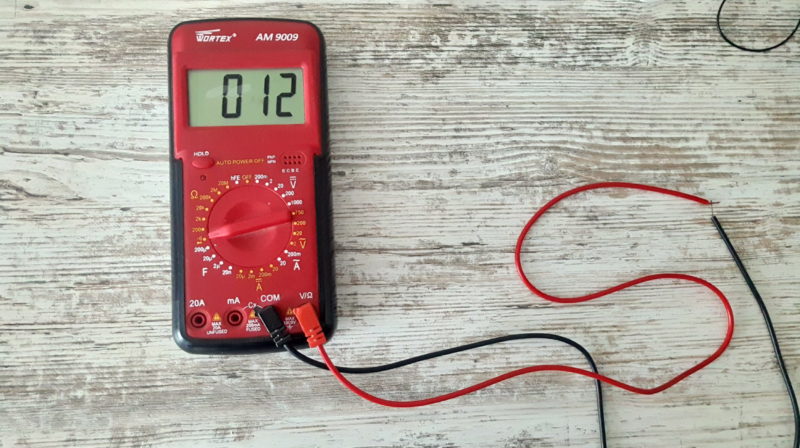
Small fluorescent or LED elements (e.g. 12 volts) cannot be tested with this method. This is due to a special electronic circuit in the inner part of the base. In this case, if the tester does not respond, any part of this circuit may have failed. To test it is advisable to disassemble the bulb and gain access to the main circuit.
How to Test an Incandescent Bulb by Yourself Video
Resistance Test Mode
It allows you to determine with high accuracy the serviceability of the bulb, as well as to make sure that the indicators comply with all regulations. Thus, you can easily determine the power of a particular electrical appliance even if the marking on the bulb or the base has been erased for some reason.

The switch of the tester should be turned to the position opposite to the marking 200 Ohm. Then with the stylus touch the contacts of the light source in the same way as it was done in the test mode. But in this case there will be no signal and the resistance value will appear on the screen. The number "1" indicates a breakage inside the light bulb.
From the measured resistance you can infer the power of the bulb. Use the table below for incandescent bulbs.
| Power, W | 25 | 40 | 60 | 75 | 100 | 150 |
| Resistance, ohm | 150 | 90-100 | 60-65 | 45-50 | 35-40 | 25-28 |
When measuring, it is important to remember that these measurements involve not very good contact between the stylus and the tester. This means that the actual result may be slightly different.
It will be interesting to read: A soft switching device for incandescent light bulbs.
Testing with an indicator screwdriver
The indicator screwdriver is a good substitute for a multimeter if you want to check the light bulb as quickly as possible. First it is recommended to make sure that the screwdriver itself works. To do this, you need to touch its metal contacts on the sides. This action should make the LED inside light up.

To check the bulb with the indicator screwdriver:
- In one hand, take the bulb by the side threads.
- With the other hand take the screwdriver and touch the metal part to the central contact. The thumb of the same hand touches the end of the screwdriver.
- The circuit closes across the lamp and the body, which causes the LED to light up. If nothing happens, the lamp is defective.
It will most likely not be possible to diagnose LED or fluorescent lamp faults in this way, because the design of such elements includes a complex electrical circuit with a set of ballasts, resistors, capacitors and other components. You can check them only by applying operating voltage to the contacts.
Advice to read: Which light bulbs are best for your home.