Chandelier mounting and installation
After buying a lighting fixture, many people wonder how to hang a chandelier. To understand it, you need to get acquainted with the ways of fixing, step-by-step instructions for performing the work. It is also useful to know how to act in difficult situations - with low ceilings, old wiring or fixing on a stretch ceiling.
Preparation, selection of tools and materials
To install a light fixture in your home quickly, you need to make preparations. At hand should be all the tools and materials, so that in the process of performing the work did not have to run to the store.
Of the tools you will need:
- An electric drill or a hole punch;
- stepladder (if it is not available, you can use the kitchen table);
- screwdriver with bits (you can also use hand screwdrivers);
- screwdriver;
- pliers.

Materials:
- chandelier;
- connection pads or special terminals;
- hook or anchor (depending on the method of attachment);
- self-tapping screws for mounting.
First you need to buy a chandelier, and then, depending on its equipment, buy additional fasteners.
When choosing fasteners, you should be guided by the material of the ceiling itself. To the concrete surface will suit anchors, for wooden ceilings special self-tapping screws, you can even without a hook. Chandelier on plasterboard is fixed with self-tapping screws on metal, they must fall into the profile.
Order of installation
Fixing the new chandelier to the ceiling will take about an hour of time. To avoid this process dragging on, you need to divide it into stages in advance:
- Preparation and installation of mounting elements. First you need to choose what will be used: a hook, bar or other option. After that, the fastener is fixed in the ceiling.
- Preparation of the wiring. It is imperative to de-energize the room when working with electricity.
![Chandelier mounting]() Before the work, the room is de-energized.
Before the work, the room is de-energized. - Installation of the chandelier and its connection. Previously prepared wires are connected to the luminaire, it is attached to the ceiling.
- Test check. On the circuit breaker you need to turn on the electricity for your apartment, to try whether the chandelier works.
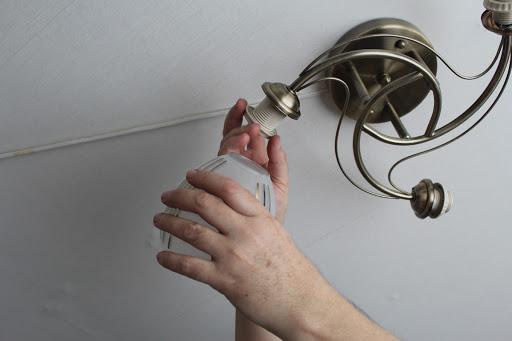
- Mounting the plafonds. If everything went well in the previous step and the chandelier works, then you can install decorative elements in the form of plafonds ..
![Chandelier mounting]() At the end, the fragile decorative parts are attached.
At the end, the fragile decorative parts are attached.

This is a general instruction for the installation of the chandelier, but it may vary slightly depending on the chosen method of installation, on the characteristics of the ceiling materials and even the characteristics of the room.
Mounting methods
There are several ways to suspend the chandelier, which differ in terms of the fasteners used. The main characteristic influencing the choice of a particular method will be its weight, because it is important that the light fixture is securely fixed in the ceiling.
Using a hook

Hook, fixed in the ceiling is a fairly reliable option for fixing, and you can install it yourself, the process is not difficult.
Hook for the lamp can only be screwed into a solid and solid base: concrete, solid wood, metal. But it is not necessary to attach it to plasterboard, plastic or other fragile materials.
The way of fixing the hook itself depends directly on the weight of the suspended device:
- Chandeliers up to 4 kg. For light versions of designs, a hook with a thread for screwing in can be used. First you need to drill a hole in the ceiling of the required diameter and length, insert the appropriate dowel into it and screw in the hook. Such a design will easily withstand most common home lighting fixtures.
![Fixing and installation of a chandelier]() Screw hook.
Screw hook. - Chandeliers from 4 kg. For heavier products will require a fixation system with anchor bolts (d>=10.0 mm.sq.) and a spacer hook. The anchor is inserted into the pre-drilled hole and tightened to the maximum.
![Fixing and installation of a chandelier]() Hook with an anchor bolt.
Hook with an anchor bolt.


"Bare" anchor hooks will not look good in every interior style, so manufacturers complete chandeliers with special bowl-shaped masking caps. This element can slide up and down on the rod, which will allow you to adjust the height of the lamp.
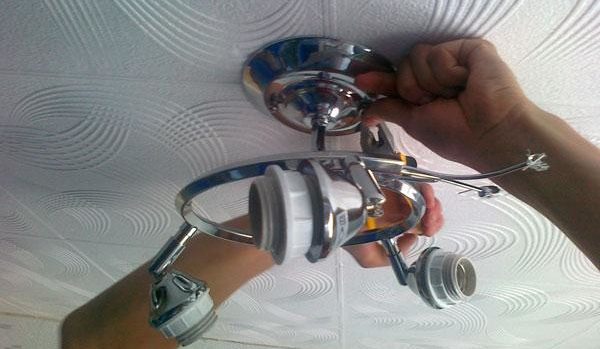
Fixing with a bracket or bar

This mounting option is a little more difficult to perform, but is also reliable and for heavy chandeliers. Included with lighting fixtures, manufacturers usually give special steel bars or brackets. In their design, there are two screws that are fixed with nuts. All this together is attached to the ceiling with wall plugs. The chandelier is also fixed to this construction with bolts. The attachment turns out to be as strong as possible.
In the method, it is important to use the right self-tapping screws. For wooden beams, special models for wood are suitable.
Simplified fixing method
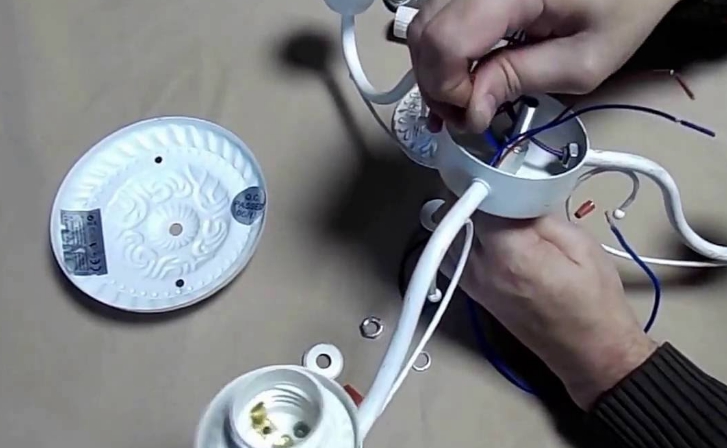
Installation of a lightweight ceiling chandelier of small size can be carried out and without special additional fasteners. The essence of the method is the direct connection of the chandelier and the base. In the design of small lighting fixtures in the upper part of the plate with holes for screws.
Installation begins with a "fitting", you need to mark the place of installation of the chandelier and draw points in the locations of the holes. Drill holes according to these points, plugs are inserted, and then the chandelier is fixed with screws.
Fixing non-standard chandelier
For some designs, the standard fixing is not suitable. In this case, you can pick up a model of the right size among the perforated mounting plates, they are sold in construction stores. Another option is to make the plate yourself, on the surface of which the necessary holes are made.
A screw-nut design can be used as a connecting element, rather than threaded elements. After fixing the non-standard fastener, the installation continues according to the instructions.

What to do in difficult situations
All standard mounting methods help to hang the chandelier yourself only on ceilings that meet all the requirements. It must be a concrete or wooden ceiling with a standard height and an even surface. Far from always meet all conditions at once, there are difficulties, but they can be solved.
A room with a low ceiling
For these areas, the problem can be solved at the stage of fixture selection. You can take a compact version with an integrated mounting system.

If you do need a full-fledged hanging chandelier, it is better to eliminate the hook from the design, for this purpose:
- It is necessary to trim the bar of fasteners. After trimming, the dimensions should be such that the element is completely hidden under the decorative cover.
- All fragile parts of the chandelier are removed, if possible, the rod is also removed.
- The wiring is removed from the terminal block.
- Behind the threads are drilled holes that should be hidden under the cap.
- Into these holes the fishing line is pulled, screwed to the wires.
- It is necessary to pull on the fishing line until the wires "come out" of the other side of the rod.
- The wires are connected to the terminal block.
Mounting on drywall

Plasterboard - an excellent material for ceilings in apartments and private houses, it allows you to quickly and efficiently level the surface. But its main disadvantage is fragility. Suspended structures should not be placed directly in the sheet.
You can't do without a chandelier, either. There are four mounting options:
- Into the rough ceiling.. Mounted in the rough ceiling and the tube from the lamp passes through the sheet of plasterboard. The disadvantage of the method - the design "eats up" part of the chandelier, so it is better to use models with a long rod.
![Chandelier mounting]() Fastening to the base.
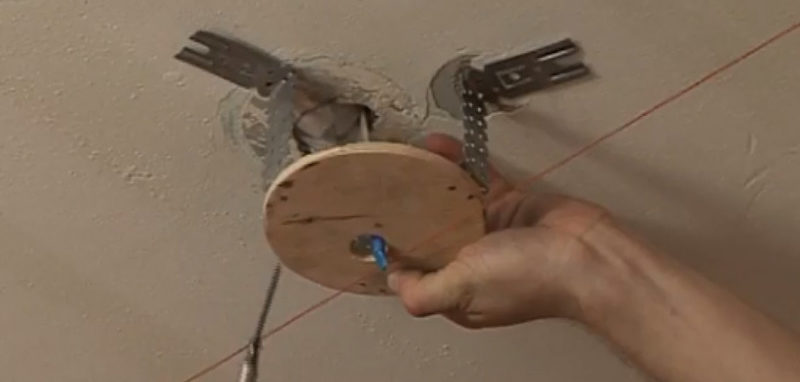
Fastening to the base. - Laying the bar. The essence of the method is that a bar is placed between the plasterboard and the rough ceiling, it is fixed to the base, and already to it - the chandelier. This design is less strong than the previous one, but allows you to avoid loss of length.
![Chandelier mounting]() Homemade embedded from plywood.
Homemade embedded from plywood. - Fixation in the profile. Metal profile - a strong part of the plasterboard ceiling, so it is in it that the mount for the lamp is screwed.
- Using a butterfly. A special fastener with spacers that will open and hold the construction inside. Butterfly hooks are suitable for lightweight lighting fixtures.
![Fixing and installation of a chandelier]() Butterfly hook.
Butterfly hook.


Read also: How to hang a chandelier on a drywall ceiling
Mounting in a suspended ceiling

Stretch ceiling is usually equipped with point light sources. But some people still decide to install a chandelier. It should be immediately clarified that this is only possible at the planning stage, in an already stretched canvas to insert the chandelier is impossible.
Before installing a stretch ceiling, it is necessary to choose the location of the chandelier. In this place is mounted frame, for this you can use plywood, metal plates. Already to the finished platform mount the mount for the chandelier.
From the video you will learn how you can hang a chandelier, if you do not have a punch and there is nothing to drill holes.
Problems with the old wiring
In old Soviet houses, you often encounter a problem - from the ceiling sticking out too short a part of the wire. You can de-energize the room and use insulated fasteners to extend the wire. But it is better to replace the fragile wiring with modern, higher quality wiring.
A control check

After the chandelier is fixed in the ceiling, it is necessary to check the reliability of the construction. To do this, it should be staggered a little. If there are problems, the connections are reached. After that, you can turn on the electricity. If there are no sparks, the circuit breaker does not automatically turn off and there is light - then everything is done correctly.
Safety rules
When you already know the sequence of work, the peculiarities of fixing methods and ways to solve problems in different rooms, it is necessary to study the rules of safety:
- Prepare in advance the tools, materials. It is important to do everything in one "run", and not be distracted by searching for the right parts in the process.
- The power supply is switched off before starting work. The circuit breaker is located in the hallway or entryway. In private homes it is placed in the basement.
- Checking the cables. Even wires that have previously been switched off on a circuit breaker must be checked with a voltage indicator before use.
![Fixing and installation of a chandelier]() A voltage check is mandatory.
A voltage check is mandatory. - It is best to work during the day.. It is more convenient to work in natural light than with a flashlight.
- Using Protective Clothing. Rubber gloves are required, as well as protective glasses and special boots.
![Fixing and installation of a chandelier]() Rubber gloves for safe work.
Rubber gloves for safe work. - Using secure connections .. It is better to use terminal blocks for this purpose.
- Checking a new light fixture. After purchase, you should check the quality of the clamping screws of the cartridge and terminal blocks. If they are poorly tightened, there is a risk of burning in these areas.


At the end of the video: The main mistakes of fixing the chandelier.