How to make an original chandelier, master class at home
If you have a creative talent and a rich imagination, you need to allocate some of your free time and devote it to needlework. You can make wonderful crafts and products. Today we will talk about how to make or transform a chandelier with your own hands.
In this article, we will reveal how to make it and what materials can be used, show you a lot of ideas and options for performing such work. Self-made chandelier will emphasize the features of your interior and surprise your guests.
The difference of a homemade chandelier is its uniqueness
Chandelier is the most expensive chandelier in the house. Made by our own hands, it will not only be unusual, but it can have a number of advantages. Relying on this, arm yourself with everything you need and get started:
- has no analogues;
- fully meets your requirements.
Chandelier with their own hands from improvised materials is already a unique design, but still there are some subtleties in this case! You can transform the queen of today's theme in two ways:
- To come up with a new version of the plafond.
- Completely create a new design from improvised materials.
Which is more suitable for you to decide, we will consider all options.
Useful video: Making a paper chandelier.
Difficulties to overcome
To make a chandelier, you need to think everything through. The main thing is not to spoil the materials. The first step to create a masterpiece you need to read the presented master classes, study photo and video instructions, and then proceed.
This order of work will allow you to understand the sequence of your thoughts, and you will get the skills of working with certain materials. Perhaps you will come up with a unique idea as you watch.
Although the work is not difficult, but painstaking, so whatever material you take, it is better to do it slowly. The light fixture created will serve you for many years. Observe safety rules when working with electrical appliances. Use only high-quality insulation and connection materials.
Before creating the luminaire, make a preliminary sketch of its final result - this develops spatial thinking and allows you to see the subtleties you will have to face. After following the instructions, you won't have any difficulty.
Recommended viewing: Butterfly waterfall.
It bends, but it doesn't break
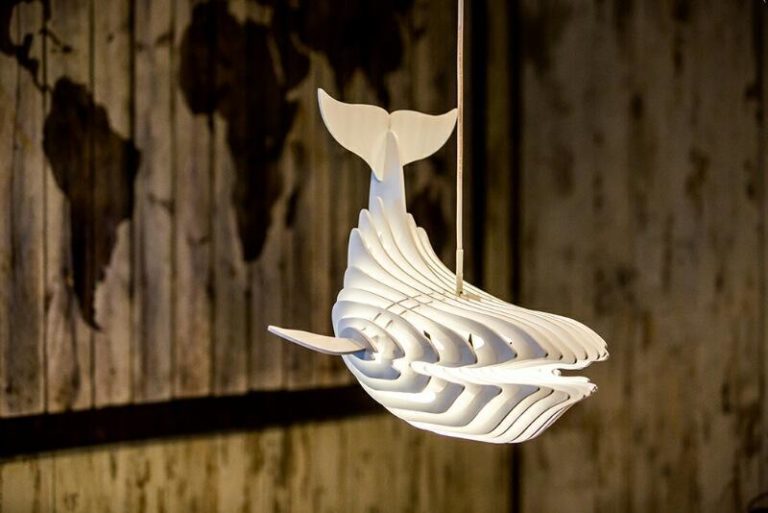
We want to draw your attention to the fact that you should not be prejudiced against wood or exclude it as the basis for a future beautiful lamp. The fact is that wood only at first glance may seem to be a material that will not suit you or you will not be able to do anything with it.
It is only necessary to heat any wood to a temperature of 200 degrees Celsius, as it acquires plasticity, and bent in the right direction and will cool, preserving the memory of the created bend. So take into account this advice and create designer things at home.
Materials are not material.
There is no better idea than the one that came to mind spontaneously, and it did not take anything but time to implement it. We recommend that you use what you have at hand. It is possible, of course, to make a fuss, to visit all the stores, to choose gold silks and designer silver threads, but it is also possible not to do anything of the kind.
A simple paper and a beautiful fabric can be the optimal material. For example, such things as a dinner set or old beads, coconut leaves and a coffee can, a child's car or a basket, an empty bottle, a skein of string, and beads would do.
10 examples for original homemade ceiling
No. 1 For Lovers of the Ride.
Such an unusual solution can be applied to a child's room. The wheel can be used of any diameter. To implement the idea, it is necessary to work a little with an electric drill.
As the lampshades of the lamp, use volumetric glasses. Choose the color and size yourself. The best source of light will be electric discharge or LED lamps with a glow temperature of 4000 K. This color shade is optimal for children's rooms.
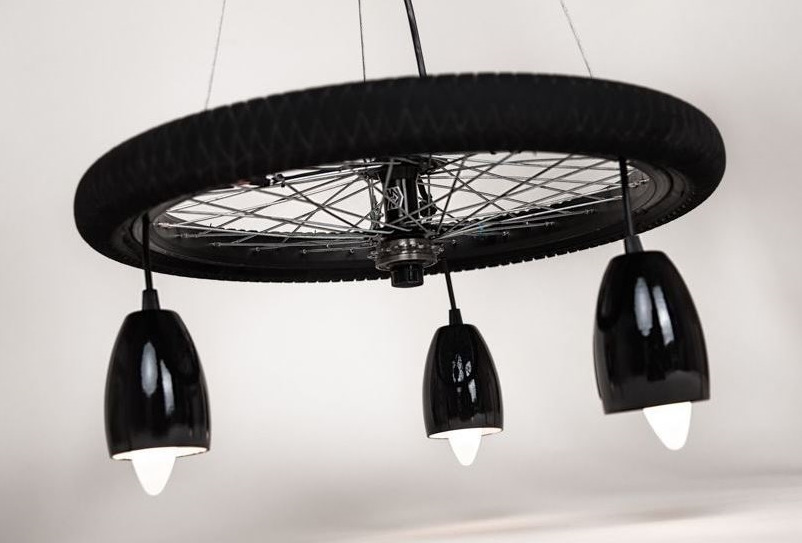
After the work of making the holes, paint the wheel in a color that will be a contrast to the interior of the room, and make the assembly of the wheel.

No. 2 Don't hang it on a hanger, but hang it on a hanger.
The point is that you will need 20 identical wooden hangers to make such a construction. If you can find that many, it will be very fast to make a light fixture.
Due to the fact that in the rim there are already prepared holes for the spokes - we will not have to use a drill, and in the holes we have a plastic coupler will fit well. To the top ring of the hanger can be attached with small wires, screwing them in with screws from the end of the hanger.
You can complement the lamp with a translucent veil, laying it inside. Old tulle will do fine. The color can also be changed at will with the help of a can of paint.

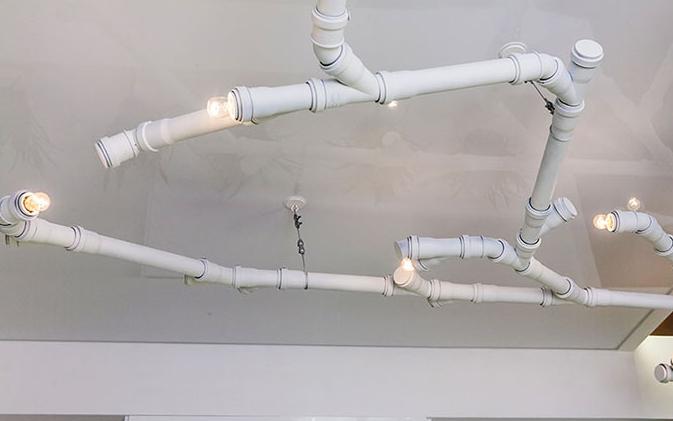
#3 Loft style will never lose its popularity
At the very beginning of the 21st century, loft has become a special style of home interior, the features of which are high ceilings, bare brick walls, open communications along with old furniture and modern technology innovations.
The style can be accentuated with an unusual chandelier. An excellent material can be iron tubes. Difficulties in this work will not arise, because all connections will be threaded. So, let's proceed.
To make the chandelier we will need:
- ¾ tee - 4 pcs;
- ¾ cross bar - 1 pc;
- ¾ corner - 8 pcs;
- ¾" to 1.5" adapter;
- ¾" pipes with diameter and length of 8-11 cm - 4 pcs;
- Connecting nipple made of bronze - 9 pcs;
- lamp socket;
- 2x0.5 mm wire2 - 5 м;
- a can of bronze or gold paint;
- 8 lamps - 8 pcs.
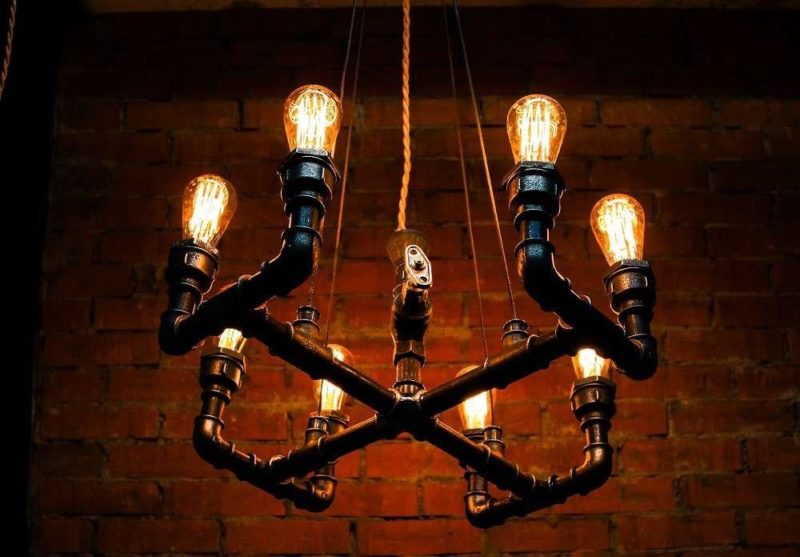
When all you need to buy, proceed to the assembly. To do this, you just need to screw all the necessary parts into place. Start the assembly with the cross, cut off the necessary pieces of cable to immediately pass them into the holes of the tubes and fittings. The cartridges are installed last. Use a heating gun for plastic to hold it in place.
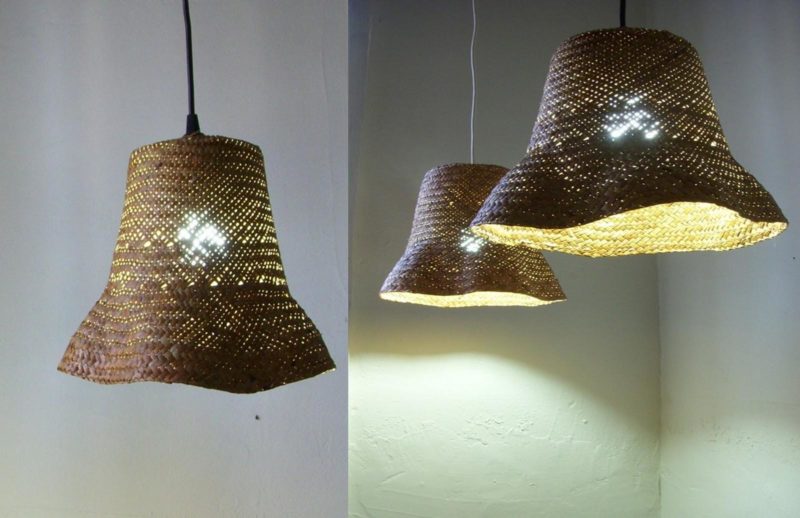
#4 Hello from an Old Friend
The benchmark of simplicity and sophistication for checkroom or intermediate room will be a composition where you will not need anything other than an old hat, wire and socket. It is important to use only energy-saving bulbs, as incandescent bulbs produce too much unnecessary heat. To install it, it is enough to make one hole and run the power cable.
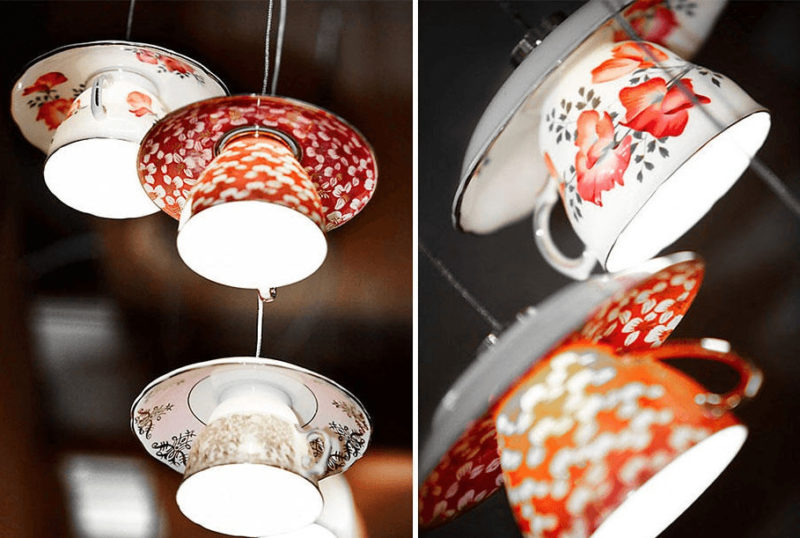
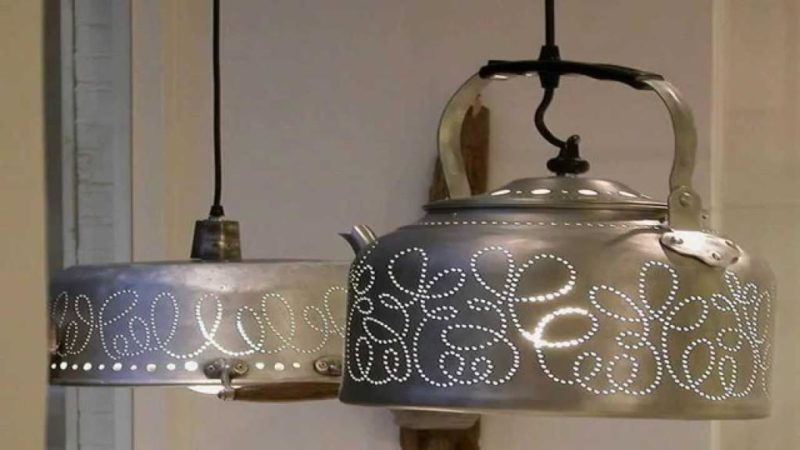
№5 For lovers of antiquity in the kitchen
This idea will find a perfect place in the kitchen. To implement it, you will need an old aluminum kettle or pot. The pattern can be copied and drilled with a 2 mm drill bit.
With the pot the idea will be easier, because you do not have to deal with the bottom, as in the case of the kettle. As a source of light, install whatever you like, a simple and effective option would be to install a discharge lamp.
The chandelier would be best placed in the work area above the dining table, such a model looks good in rooms with high ceilings. The recommended height of suspension is 1 m from the ceiling level.
To make it you will need:
- drill 2 mm - 5 pcs;
- electric drill;
- An old kettle or saucepan;
- socket for the lamp;
- Capron thread for the suspension;
- 1,5 m of wire.
No. 6 Straw Chandelier
It is based on a chandelier made of wire, twisted into a ball shape. All the straw elements are mounted to the base with a heat gun, it uses interchangeable plastic pencils.
It is not necessary to abundantly apply molten liquid plastic, it will be enough one drop and the straw will never fall off. Use such chandeliers on porches and in summer arbors as the main lighting.

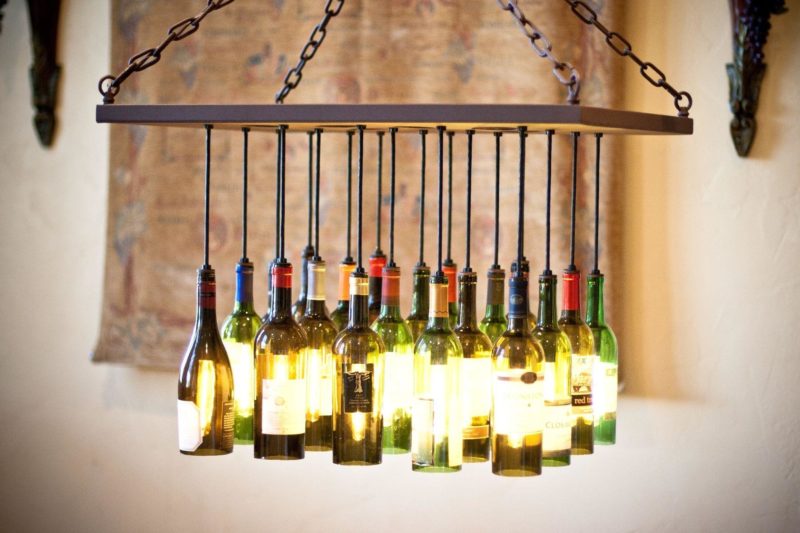
No. 7 Bottles not to throw away
To create such an original lamp, we will need a good wooden base - wooden board, bottles, wires, chains and 5 fixtures will work best. As light sources, you can use LED stripsIt is easier to put them in the neck of the bottle and you will save a lot of money on bulb sockets.
The light from such a chandelier will be diffused, with brown and green shades, so you should not worry about bright light sources. Such a lamp will complement your cozy evenings with its enchanting semi-darkness.
Glue the LED strip back-to-back and solder the power supply. Place the power supply somewhere out of the way.
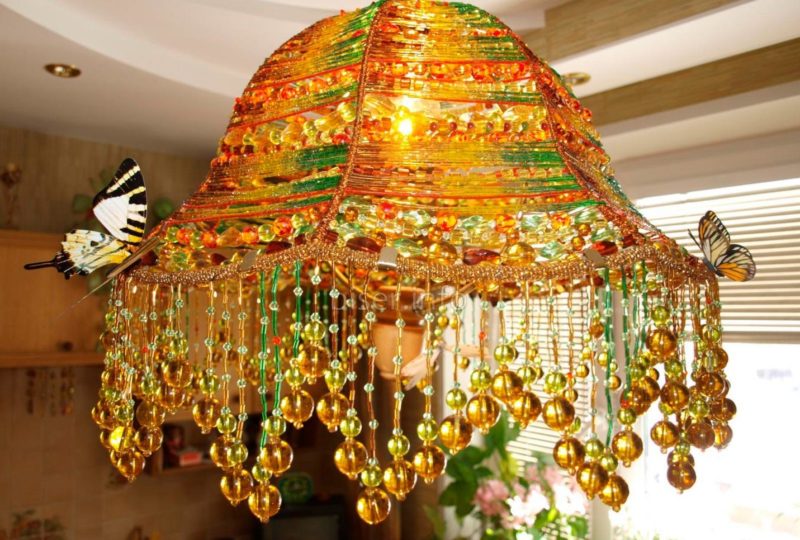
#8 Bead Chandelier
The idea is very good, but time consuming. The chandelier would be good for hallway. It is better to use a ready frame from an old floor lamp as a lampstand. Take beads and beads of bright colors.
String the elements on a usual fishing line and fix them to the frame structure. Complement the finished product will be appropriate flowers and butterflies, which can be separately purchased in specialized stores.
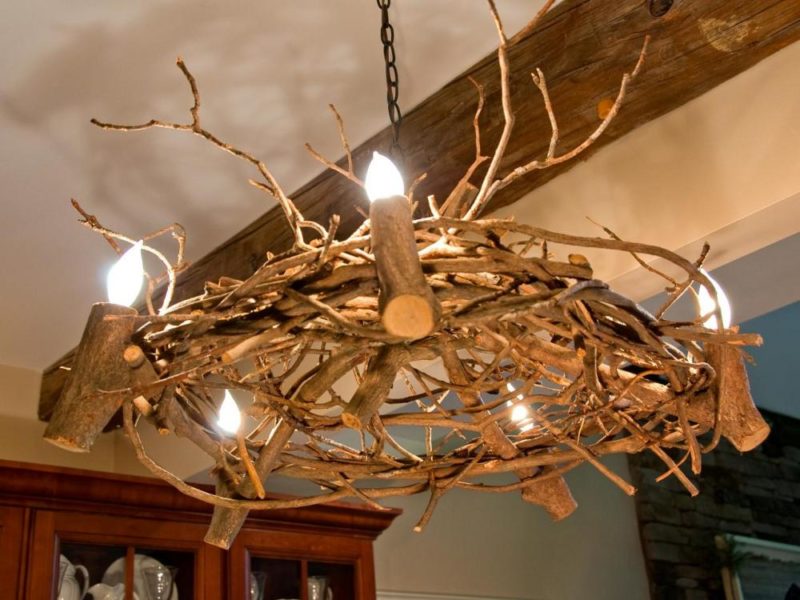
No. 9 Kerosene lamp will work forever
Fans of the vintage style will love this idea. An old kerosene lamp can be found on summer country walks in almost every house, all we will need to implement this idea is your pens, a can of paint, some wood and metal wire.
Such lights can be used as the main and additional lighting. The only point is the mounting. In the example shown, a wall mount is used. For it, you need to work a small piece of wood, giving it a special shape. You can use a carving kit. This will help to emphasize the structure or create a unique pattern.

The light of such sources is diffused and therefore it is better to apply it as a flood lighting at night, taking lamps of low power. Such lights look good in a pair.
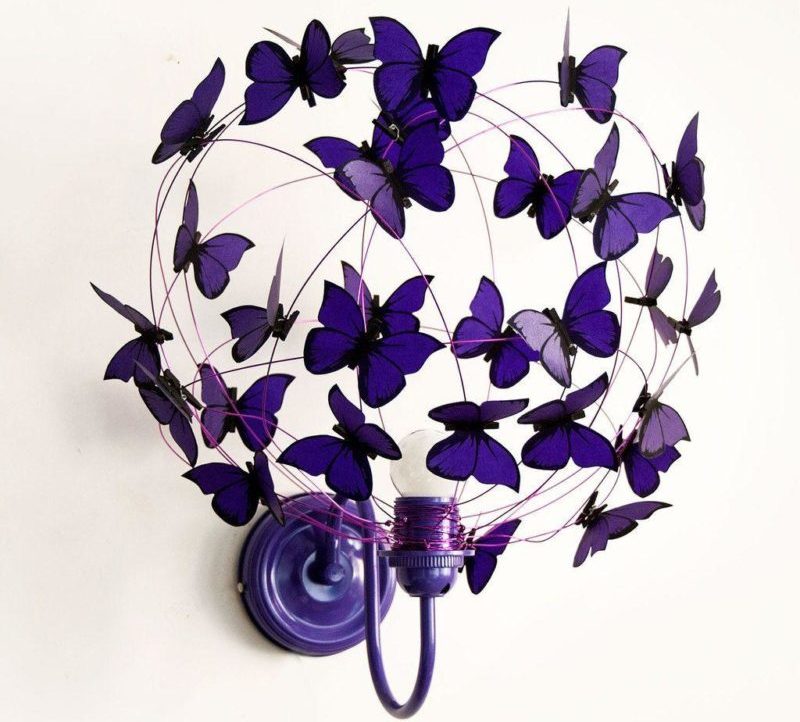
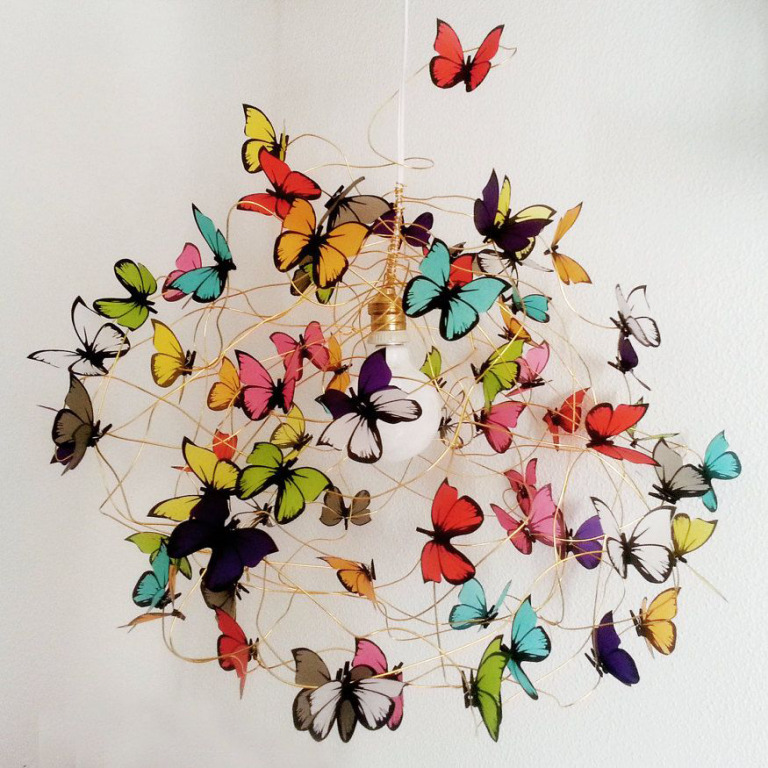
#10 Butterflies fly high
As the base of the lamp, any Soviet version will work well. For the design to turn out interesting, you can buy butterflies and work with your own hands on their transformation.
As a place to which the butterflies will be glued, serve as a thin steel wire, it is attached to the lamp holder with pliers. Then the place of twisting and crimping can be veiled with woolen rope, it will add an unusual effect to your light fixture.
Video on the topic: Foamirin roses.
Safety inspires and saves lives
Use only quality materials for the conductive parts. It is unacceptable to use small cross-section wire. To connect lighting fixtures, use 2 copper conductors with a cross section of 0.5 mm2.
Step-by-step instructions for connecting the chandelier:
- Turn off the power supply in the room completely. To do this, unscrew the plugs or disconnect the circuit breakers.
- Take a stable surface for easy access to the attachment point. A stepladder or dining table will work.
- Check if the hinge in the ceiling is properly secured. If not, install a new one.
- Mount the bracket in the opposite direction to the incoming cable, so as not to damage it.
- The light wires must have a small margin (15-20 cm) in order to be able to hang the chandelier and make a high-quality connection between the wires. Use connecting strips. The leftover wires will fit into a protective sleeve, which is threaded over the chandelier's power cable before installing it.
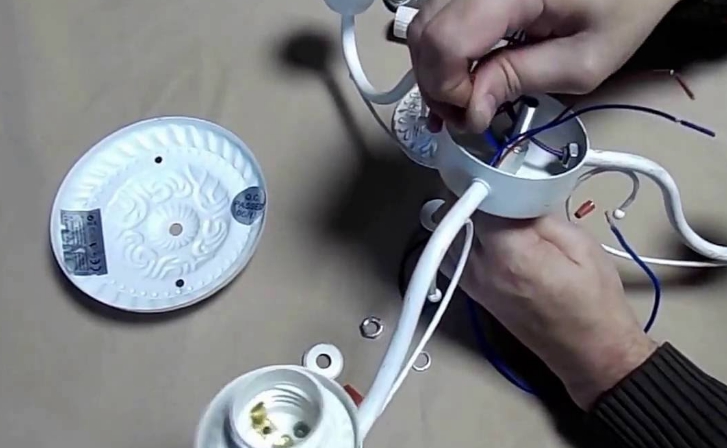
Use an indicator screwdriver to determine the phase!
Video lesson: Hanging flowers that can decorate your ceiling.
Useful tips
You can borrow the idea of creating especially exquisite items from famous brands of such products. It is worth only adding a little bit of imagination, and most likely your creation will look better than in the showcases.
You can find an interesting store with accessories and attachments, there you can find not only beautiful butterflies, but also a bunch of different and amazing things. Including mounts for future designs.
Choosing a chandelier, look at what the standard model fits into the interior, and from this and be guided. It may be worth only a little addition to the already ready lamp, based on the knowledge gained.
Decide on the colors and materials at the first stage, so you do not have to remake anything in the course of the play. In classic interiors, the warm colors of fabric and paper lampshades installed on copper structures fit best.
For children's room it is better to use lights that will be as safe as possible, and will not contain breakable parts. Plastic is well suited for this purpose. Also, do not forget about the voltage in the network. LED lights will be much safer. Colors are better suited dynamic and bright.
Do not forget about the size. In a small room, a large light fixture is inappropriate, and in a large room, on the contrary, a small one will simply get lost. In the second case, you should apply a mix of small ones - this will help to create a volumetric composition, in this case you can place the lights at different levels.
Chandelier made of paper will look beautiful in a large room, but making it requires certain skills. To do this, see the master class in our article, it shows in detail how to perform such operations correctly.