How to make a ring illuminator at home
The ring lamp with your own hands is made in a short time. In terms of characteristics, it is not inferior to ready-made variants, and the price is at least half the price. So it makes sense to understand the peculiarities of the assembly to buy everything you need and make a light at home.
Advantages over studio light
The ring lamp has many advantages that make this option preferable to a stationary studio light. Due to the simplicity of design, even an inexperienced photographer will be able to use the light and the results will be much better. The main pluses are as follows:
- Mobility. The ring light can be easily moved from place to place, carried to different rooms or carried with you. It doesn't require a stationary mount.
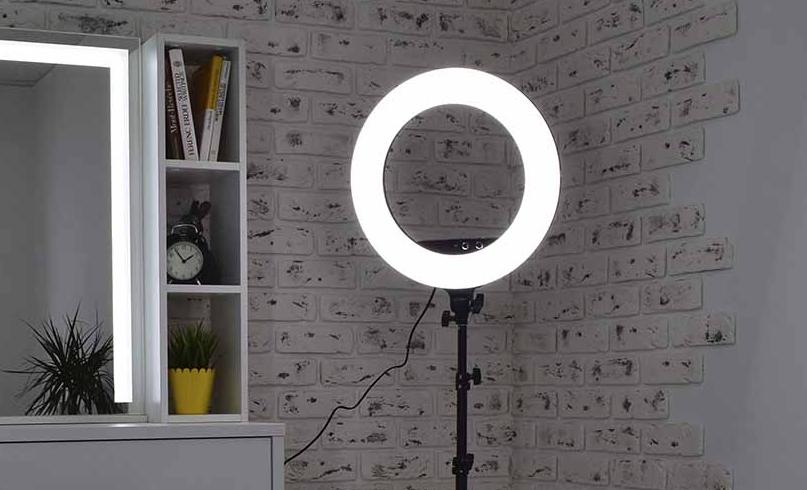
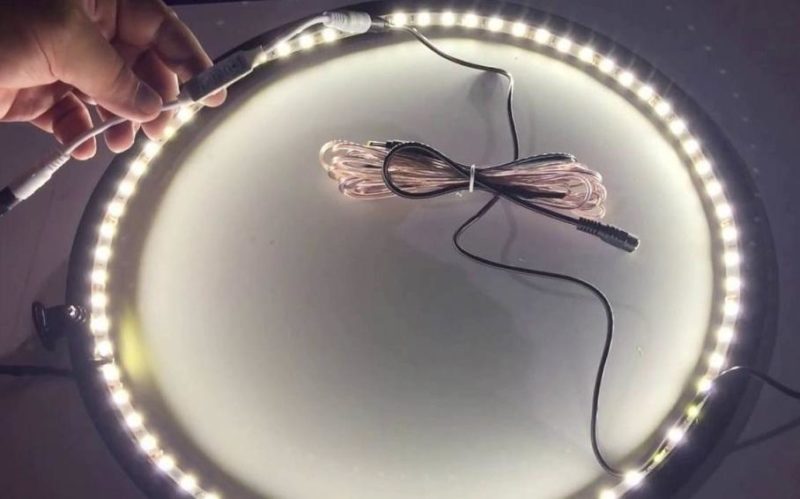
![How to Make a Circular Light at Home]() The ring light is easy to move from place to place.
The ring light is easy to move from place to place. - Easy setup. Unlike a studio light, you don't have to take a long time to adjust the location of the lamp. You can use it right after turning it on by positioning it in the right place.
- You can use the ring light indoors and outdoors. This option will help you take quality pictures anywhere.
- This type is much better for taking pictures of children. It attracts their attention and they always look in the right direction.
By the way! The power consumption of a ring lamp is much less than that of a stationary system. This is important for professional photographers and those who often have long photo shoots.
What light sources can be used?
The principle of operation is always the same - the light elements are located on a circular base. This provides uniform lighting without shadows and glare, which is very important for close-up shots. The three light sources described below are the most common.
LED lights

The option involves the use of small bulbs with a diffusing plafond, which are located on a base in the form of a ring. To make a lamp is not very difficult:
- A piece of plywood with a thickness of at least 10 mm is selected, a ring of the chosen diameter is cut out. The easiest way is to first draw the outline and then cut with an electric jigsaw.
- The location of the bulbs is marked along the perimeter. They must be evenly distributed on the ring and make marks strictly in the middle. Holes are cut, their size depends on the diameter of the cartridges, which are bought in advance.
- To drill the holes, a drill or a screwdriver with a drill bit for wood of a suitable diameter is used. The size does not have to match perfectly, it may be slightly larger, the quality of attachment is not affected.
- Chucks are fastened in the prepared places, wires are connected to the rear contacts and connected in parallel. Since each light bulb has a driverIt is not necessary to install a power supply. You attach a wire with a plug that plugs directly into a socket. You can add a switch to the system.
- For such a lamp it is worth to make a stand and think about its mounting with the possibility of adjusting the angle and height. You can also use ready-made solutions.
If you need to change the brightness or color temperature, you can rearrange the bulbs in a couple of minutes. The main thing is to have a kit with the right characteristics on hand.
[ads_custom_box title="Video tutorial" color_border="#e87e04"]Professional ring light from polypropylene pipe.[/ads_custom_box]
Ring energy saving lamp.
With a ring-shaped fluorescent lamp, it is not difficult to make a compact light. It will provide good color rendering and brightness, but we must remember that ready-made lamps only come in small sizes. The luminaire is made as follows:
- First of all, a light source with suitable characteristics is purchased. Next, you need to pick up the base, it can be plywood or thick cardboard, the surface is not very hot when working.
- For fixing, special clips are used, which are chosen according to the diameter of the lamp. The main thing is to securely fix the light source, the switch is easiest to fix also on the base.
- The power cord is connected to the connector through the plug. It should be led through the switch. It is also worth thinking about the method of installation, it can be a ready-made tripod or any other suitable solution.
Caution. In the manufacture of fluorescent lamps, mercury is used. Therefore, if they damage There is a danger of injury if they are damaged.
Light-emitting diodes
The LED ring gives a uniform light and is not difficult to manufacture. This is the most popular solution, which is most often found both in ready-made and homemade form. The features are as follows:
- LEDs consume the least amount of electricity. They provide even light without flicker and have a lifespan of 50,000 hours or more.
- Almost everyone is able to assemble a light fixture. The process is described in detail below, as it should be broken down in detail.
- The choice of LED strips is very large. They differ in power, color temperature and the number of light sources per linear meter. This makes it easy to choose the best solution.
- You can also use spot diodes, but it is much more difficult to make a ring light from them. You have to prepare a printed circuit board and to solder each element separately.
Useful video: $7 ring light
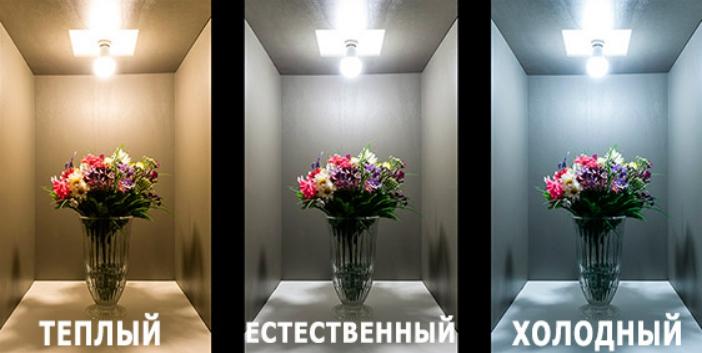
Warm or cool light
It's important to determine in advance which option is best. Here it all depends on the characteristics of photography and the environment. There are three basic options:
- Cold light. Used by makeup artists and stylists, also suitable for food photography. Can be used in modern photography, but distorts colors, making them appear colder.
- Warm Light. Has a yellow hue and can be used in some cases.
- Natural Light. A versatile solution that offers natural color reproduction and is close to sunlight. Can be used almost everywhere.
By the way! Using multicolor LEDs for color temperature control is not the best solution. They do not give quality light.
Step by step instructions for making a ring lamp of LED strip
The ring lamp with LED strip is collected by your own hands in a couple of hours, if you have everything you need at hand. The work should be organized correctly, so it is worth remembering a few simple recommendations:
- The diameter of the lamp is determined in advance. It all depends on the purpose of use. The dimensions should not be very large, as in this case a darkened area is formed in the middle.
- For the base you can use plywood, rigid plastic or plumbing metal-plastic pipe. The latter solution is convenient because it is easy to bend and form a ring.
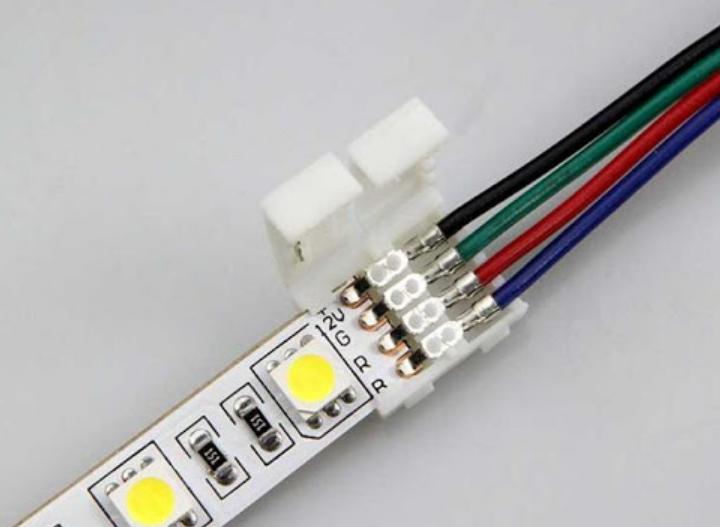
- LEDs are better to take a single color. It matters the brightness (depends on the number of diodes per linear meter) and color rendering index (at least 80, the higher it is, the more natural the colors).
- You also need copper stranded wires for connection and power supply. It should be chosen according to the total power of diodes used. For convenience, a switch is put in place.
- First the base is made. Then LED tape is glued to the surface, it is better to use a waterproof version. It must be placed evenly, you can pre-draw a line for orientation.
- To adjust the brightness, it is better to use 2-3 rows of tape glued side by side. You can turn them on separately and thus make the light brighter. Using a dimmer is undesirable, as it can distort the color rendering and impair photography.
- It is best to provide two types of power. The first is from the mains via a unit of suitable power supply. The second is using a 12V 12 V power supplyto ensure mobility. To do this, you can buy a ready-made version or adapt an external battery for charging your phone. In this case, you need to take out a connector.
- As a bracket is chosen any element that is on hand. It is easiest to buy a ready-made, used version, it will cost cheap.
You can glue tapes with different color temperatures on both sides of the ring, if you need to change the lighting when taking pictures.
[ads_custom_box title="Video tutorial" color_border="#e87e04"]Homemade 35 watt ring light using LED strip.[/ads_custom_box]
How to take pictures with a ring light
There are a few recommendations, following which will help you get quality photos even for those who don't have much shooting experience:
- Direct rays into the lens should be avoided. Therefore, it is better to take pictures from as far away as possible.
- The optimal position of the ring light is one and a half to two meters away from the person. But the figure can vary depending on the size of the ring.
- It is recommended to use wide-angle lenses. The flash should be turned off.
What to pay attention to when choosing a new lamp read this article.
Foreshortenings and distances to choose according to the situation, to understand the peculiarities of photo shoots with the use of ring light is not difficult.
To assemble a ring lamp with your own hands is simple, if you study the design and buy everything you need to work. LED strip is ideal, as it gives good light, easy to install and safe to use.