Installing track lighting fixtures in a stretch ceiling
Connecting track lighting fixtures is an uncomplicated process if the busbar can be fixed to concrete or other rigid base. But if the room is stretch ceilings, the installation is significantly more complicated, so you need to understand all the nuances, to do the job correctly and not to damage the canvas. To use tracks, it is necessary to make preparations in advance, otherwise you will have to redo stretch ceiling.

Track lights in a suspended ceiling - is it possible
Some time ago it was thought that to put a track in a suspended ceiling - it is very difficult and the work should be carried out by professionals. But over time, technology has advanced and now you can choose one of the options that allow you to implement the idea without too many problems:
- Constructing a niche for the installation of a magnetic bus duct. The size can be different, some make it big enough to hide there and plafonds, it all depends on the idea. Most often the construction is assembled from metal profiles and reinforced with lintels to increase stiffness. The surface is clad with plasterboard and finished to make it attractive. The solution is reliable, but rather labor-intensive to implement, so without experience in this area it is better not to use it.
- Mounting a rigid base, which will be located exactly under the surface of the ceiling. This can be a special bracket, as well as a wooden bar or metal profile. After stretching the ceiling, you need to glue a small ring to make a hole and pull the wire through it. To fix the track, it is necessary to glue small spacers, through which you can safely screw self-tapping screws.
![Installing track lighting fixtures in a suspended ceiling]() Options for installing the track on a suspended ceiling.
Options for installing the track on a suspended ceiling. - Using a built-in aluminum channel, which is attached to the ceiling. Its size and configuration are designed to install the track, which greatly simplifies the work. The rigid construction of the base allows the installation of systems of any length, and the edges of the profile allow you to fix the canvas without modifications and additional work.

If the latter option was chosen, you should find out whether there is a special profile on sale, as it is still rare.
How to install the bus duct so as not to tear the canvas
To begin with, you should figure out how to install a track light, if you use a tab, fastened in advance above the canvas. This is an uncomplicated solution, which can be done even with minimal experience in construction. The instructions look like this:
- The size of the bus duct and its location are determined. First, the simplest scheme with dimensions is made. Then it is necessary to mark the surface of the ceiling to mark the position of the future construction.
- Wiring is laid in advance, it is better to use a flexible cable with copper conductors. The cross-section is selected according to the total power of the equipment, for concrete slabs use special fasteners so that the wire does not sag and held securely. A sufficient reserve is left for connecting the track.
- For installation, it is best to use a wooden bar or rail of suitable length. To set the optimal position, it is easier to use hangers for drywall to fix to the ceiling, as they can be bent as needed. Hangers are fixed with dowels to the concrete, and screwed to the joist with self-tapping screws.
![Installing track lighting fixtures in suspended ceilings]() Metal corners are also suitable for fixing the bar.
Metal corners are also suitable for fixing the bar. - After stretching the ceiling, you must first lead out the wire, to do this, glued a plastic ring of suitable size, inside which is cut a hole.
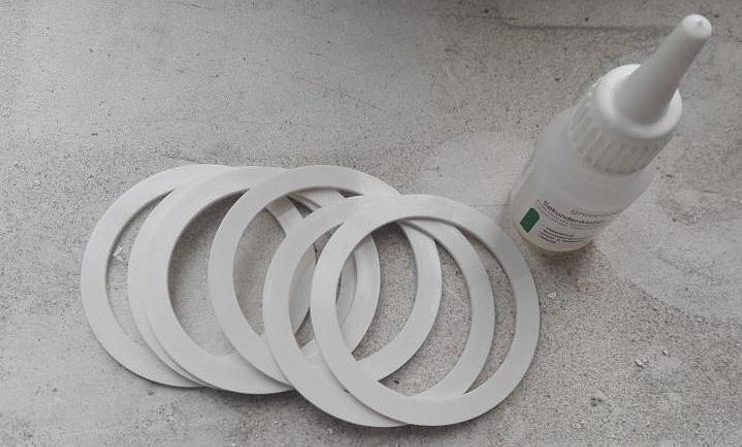
![Rings and glue for the stretch ceiling.]() Rings and glue for the stretch ceiling.
Rings and glue for the stretch ceiling. - Next, you need to glue washers, through which you can screw self-tapping screws to fix the magnetic busbar. Then the contacts are connected via a socket or by soldering and the system is tested.


By the way!
If there are no washers for self-tapping screws, you can glue pieces of tape on the ceiling and screw the fasteners through them.
Technology of mounting the busbar light fixtures in the recess
This is the most modern solution, which is not difficult to implement, if you have everything you need at hand. To do the work, you need to pre-determine the length of the track and its location. It is easiest if it will run from the wall, but you can also place it in the middle. The work is carried out as follows:
- It is necessary to buy a special aluminum channel, designed for the attachment of the magnetic busbar. Its length is usually 1, 2 or 3 meters., sold in the same place as the other components for stretch ceilings. This element can have different colors, it is selected version to match the color of the leaf.
- It is necessary to install the profile strictly according to the level of the future ceiling. To do this, use a laser level or string a cord between opposite walls. Ideally, the box is attached directly to the ceiling, but you can use adjustable brackets to set the exact position.
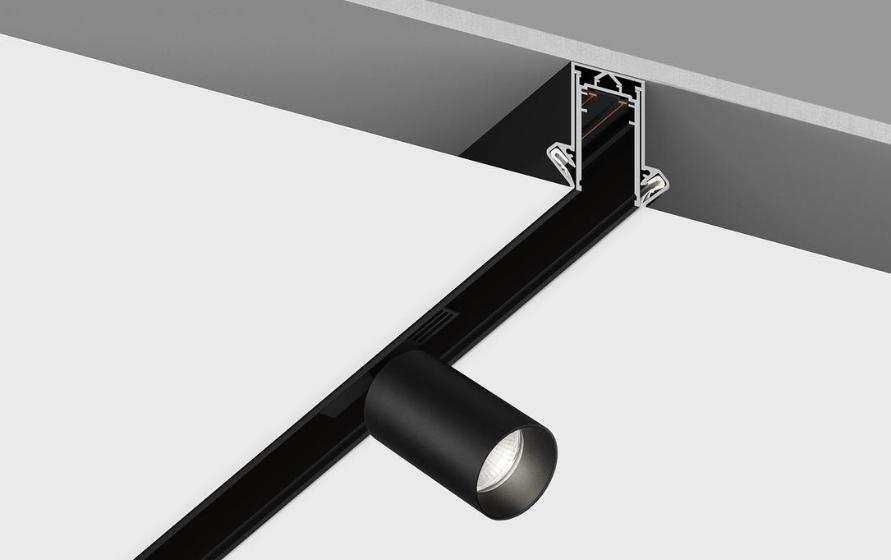
![Installation of track light fixtures in a suspended ceiling]() Fastening the profile directly to the ceiling.
Fastening the profile directly to the ceiling. - When the fabric is stretched, a cutout is made in it according to the size of the aluminum channel installed, and the edges are tucked in the same way as in standard profiles, which ensures a fast and firm attachment. The result is a finished ceiling with a recess for the installation of magnetic bus duct.
- The track is inserted into the prepared place. There is nothing difficult, the main thing is to do everything carefully and check the reliability of attachment, so that the element does not fall out of the channel.
- You need to connect the busbar through the pins that have been brought out. The wiring should be connected using a pad, clamping the stripped wire ends or soldering them to ensure good contact. If necessary, a piece of heat shrink tubing should be placed over the joint and heated to protect it. The wiring should be laid in advance, as you will not be able to do this after the ceiling is stretched.
- Installation of the lights on the busbar is done as usual - they are snapped and held by a magnet. You can place them in any place, after testing the work the lamps are adjusted for the best result.
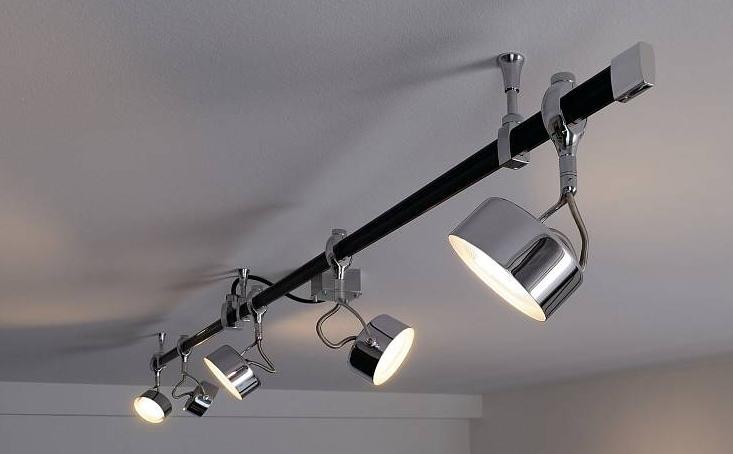
![Installing track light fixtures in the stretch ceiling]() This is what a built-in track in a suspended ceiling looks like.
This is what a built-in track in a suspended ceiling looks like. - The system can be controlled either with a standard switch, like a chandelier, or using a motion sensor or remote control.

The profile must match the stretch fabric used.
Mounting track lighting fixtures in the niche
This option allows you to make a niche of any size and configuration, as it is assembled in advance. It is important to make a construction, to which you can then attach the profile, in which the tensioned canvas will be fixed. The work is carried out as follows:
- First of all, a detailed project is made, where the exact dimensions and location of the box are specified. Next, using a laser level make a marking of the location of the future stretch ceiling, and then a few cords are stretched to create a clear reference point. It is important that the construction is exactly on the level, as any errors will be visible after the end of the work.
- A marking is made on the ceiling, then elements are attached to the ceiling with dowels. On them, lintels are placed, and then the lower part of the profile is screwed on. It is important to make a rigid structure that will withstand high loads and will not deform over time. The minimum wall thickness is 28 mm, this is the size of the wall profile. It is better to choose a stronger profile of metal with a thickness of at least 0.55 mm.
![The niche can be quite wide.]() The niche can be quite wide.
The niche can be quite wide. - The structure is covered with plasterboard, here it is important to do everything accurately, so that there were no irregularities in the corners and joints. You can additionally reinforce the drywall after cladding with mesh or glass fiber. Then the surface is puttyed and sanded, after which it must be painted in the color of your choice, as after pulling the cloth to do this will be much more difficult.
- Do not forget about laying the cable to the place of future connection. It is necessary to look at the magnetic bar, where the contacts are located, in order to bring the wiring in the right place. Leave at least 15 cm for easy connection.
- The track is installed, first it is connected to the wiring using any method except twisting. Then it must be fixed, without a suspended ceiling it is much easier to do.
- Then the canvas is stretched, fixing the profile on the outer sides of the box. When the installation is complete, the spotlights are installed and checked for proper operation.

Video lesson: Overview and installation of the track system built into the stretch ceiling.
Install track lights on a suspended ceiling is easier than many people think. To do this, you need to choose a suitable method and conduct the work according to the instructions, following the recommendations and paying attention to the strength of attachment and the safety of electrical connections.