LED strip lighting for stretch ceilings
LED strip under the suspended ceiling - a solution that looks unusual and suitable for any room. To make such illumination, you do not need to be an electrician, any person can cope with the work. But there are many features that should be taken into account in order to fix the elements correctly.
Why this is needed
You can put a strip both above the canvas, and under it, or use other schemes to achieve the desired effect. Usually LED strip or single elements are used for such purposes:
- Decorative illumination around the perimeter of the room or in niches, which are constructed in advance from plasterboard. Options can be used with the location of the tape in multilevel designs, on projections or on the circumference of the protruding element, which creates a floating effect.
- Main lighting. Most often in this case use single-color options with high power to ensure optimal light output. The ribbon is most often placed along the perimeter or above the canvas.
- Creating artistic effects - starry sky, various figures or abstract lines.
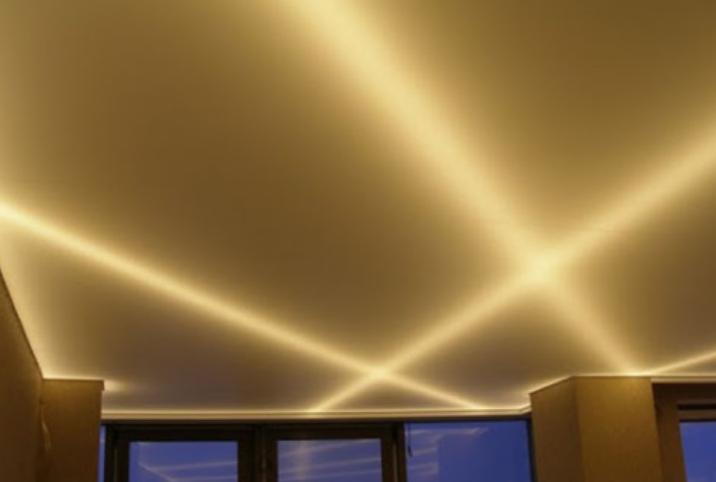
The canvas of the stretch ceiling scatters the light of the diodes, which provides an additional decorative effect.
Advantages and disadvantages of the design solution
The use of LED strip has many advantages when it comes to the option with the location above the canvas. If the ceiling is already stretched, you can place the lighting a little lower, this is also a good solution, which has the same advantages. The main advantages are as follows:
- The service life is 50,000 hours. You can place the elements above the ceiling and not worry about having to replace them in a year or two. Depending on the mode, the lighting will work for 10 to 20 years or even more.
- Small dimensions. A width of a couple of centimeters and a height of less than 5 mm allow you to fit the strip almost everywhere, even if the indentation of the cloth from the ceiling partition is small. In such cases, put a built-in light fixtures will not work.
- During operation, the LEDs are not very warm, which is important for enclosed spaces. Of course, to improve heat transfer and avoid problems, it is better to use an aluminum profile, it will further dissipate heat and eliminate overheating.
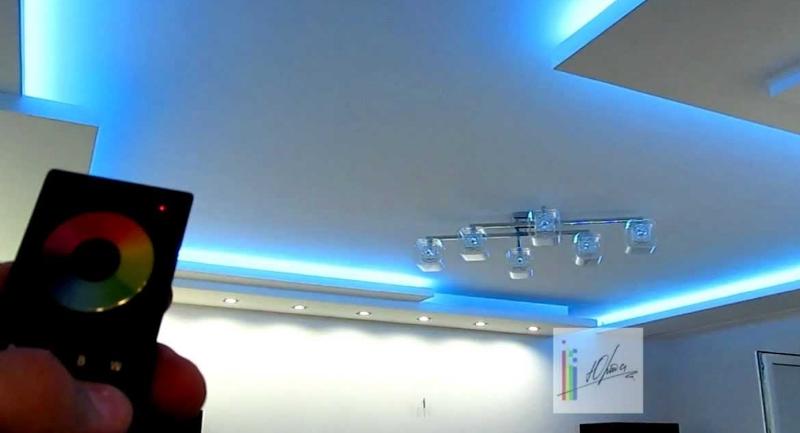
- It is possible to realize different projects and make backlighting of any color. And due to the remote control, you can adjust the brightness or shade in a few seconds.
- Low power consumption. This is an economical way of lighting, which consumes many times less electricity than analogues.
If you take apart the disadvantages of the constructive solution, it is worth noting a few important nuances that should not be overlooked:
- It is necessary to prepare the design and install the LED strip in advance. After that, the craftsmen must carefully conduct the installation, so that no dust gets on the installed elements.
- If something is done incorrectly, it will not be possible to redo it without dismantling the ceiling.
- To replace a burned element will have to remove the canvas, for this you need to call masters. The service costs money.
- It is necessary to place all the parts of the system correctly. If you leave the controller under the ceiling, it will overheat during operation, which will provoke a quick failure.
- Until the canvas is stretched, it is impossible to assess how bright the backlighting is and whether the result corresponds to what was intended.
What LED-tape and other accessories to choose
When choosing it is necessary to take into account several recommendations in order to choose reliable equipment and ensure the long-term operation of the system. This is important when placed above the ceiling. Keep the following tips in mind:
- For general lighting or white light, it is best to choose monochromatic LED strips. They differ in color temperature - warm white - up to 2700 K, neutral - from 4000 to 4500 K and cold - 6000 K and more. There are monochromatic types of different colors, they can also be used.
- Multicolored options are good because you can change the shades in a wide range, as well as adjust the brightness to achieve the desired effect. There are several varieties, it is necessary to select according to the requirements for lighting and the features of the stretch ceiling.
- Power supply should be chosen according to the total power consumption. It depends on the power of LEDs and their number per linear meter. Use a model that is at least 30% more powerful, then the unit will not work under the load limit and will last much longer.
- You will need a controller for RGB ribbons to change their colors. More expensive models can smoothly change shades, create shimmers, running lights, etc. Power should be the same as the adapter or a little more. The controller should be selected according to the type of multicolor tape.
These are the basic elements, additional nodes can be used. Do not forget about the wires that connect the parts. You can buy connectors to connect the tape without a soldering iron.
DIP and SMD technology - features and differences
Two varieties of LED strips that differ in their performance and some other characteristics. To understand the design is not difficult:
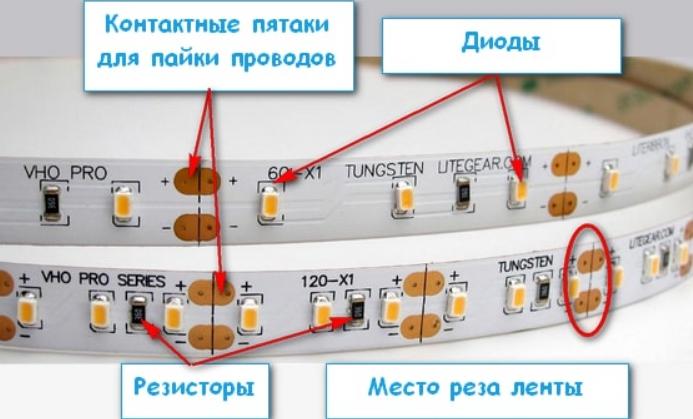
- DIP - a variant, familiar to everyone since the last century, the basis - hemispherical LEDs, which are installed in household appliances, cars, etc. They are also mounted on a flexible base. To get the ribbon, usually located on a meter from 24 to 120 pcs. The more diodes, the more even and brighter the light. They are only monochromatic, the basic colors are white, yellow, blue, green and red.
- SMD stands for surface mount device. Diodes are soldered or glued on top of the base, the numbers after the abbreviation show the length and width of the element. Products can be both monochromatic and multicolored (RGB). They are most common and are more suitable for rooms due to availability and small size.
SMD-variants are characterized by a sickly even light, so it is better to use them in the rooms.
How to properly install the lighting with your own hands
Instructions for the work depends on which variant of LED backlighting of the suspended ceiling is chosen. It is necessary to determine in advance a suitable method, prepare everything you need and follow the recommendations from the relevant section.
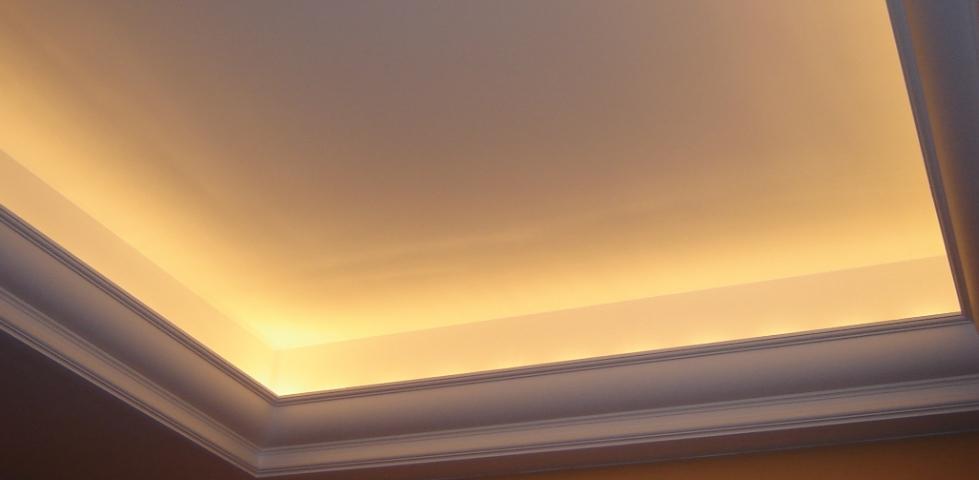
Features of installation in the ceiling plinth
In this case, the lighting is on the outside and is done after laying the canvas. This simplifies the work, you can not hurry and well think through the location of all the elements. Follow simple recommendations:
- Choose a skirting board of medium or large width. Determine the position relative to the ceiling, usually leave a gap width of 3 to 10 cm.
- Determine the position of the LED strip. It should be positioned so that it is not visible from a human height.
- Attach wires to the strip with a connector or solder. Consider the location of the power supply and controller If the plinth is wide, you can put it in a niche. When connecting, observe the polarity and check that the connections are secure.
- Glue the tape around the perimeter of the room. On the back side there is an adhesive layer, but if it does not hold well, it is better to additionally use double-sided tape. Pre-clean the surface from dust and primer if it is porous.
- The last thing to be glued is the skirting board, which is the most convenient option. Nothing interferes with the work and you can set everything perfectly flat.
If the temperature in the room is high, it is better to glue an aluminum profile to the wall and mount the strip on it, so that it cools better.
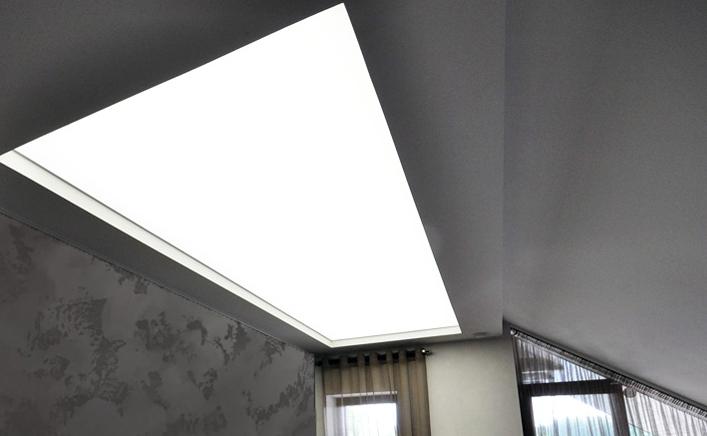
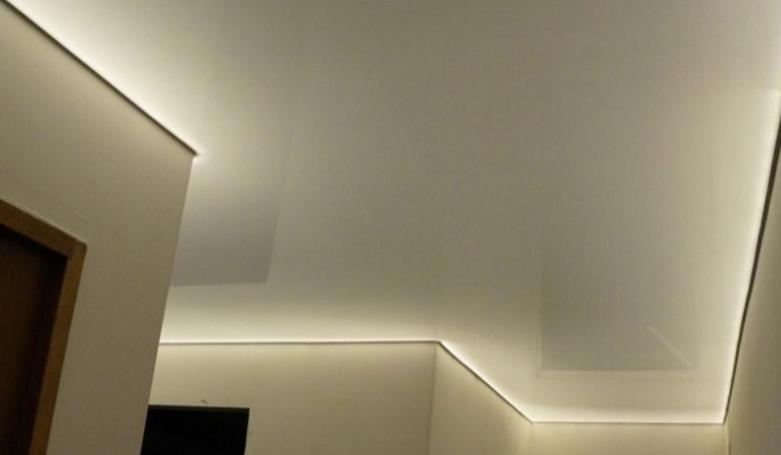
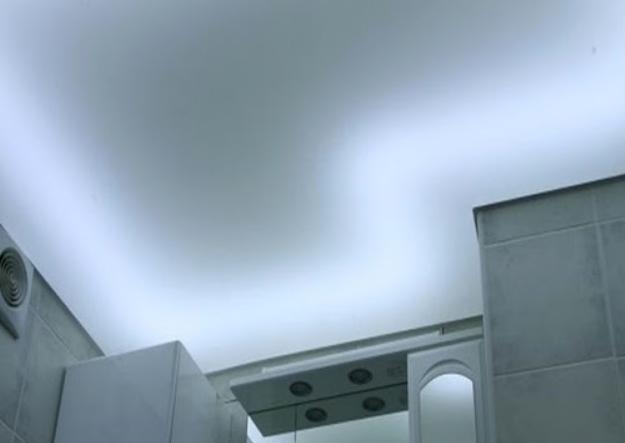
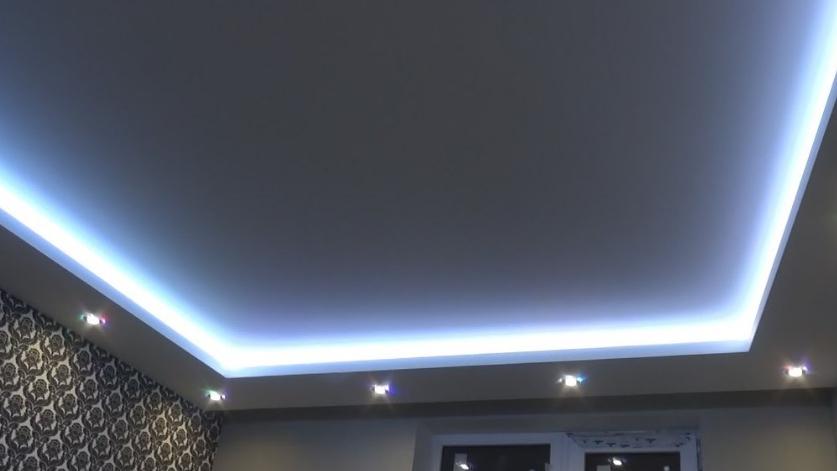
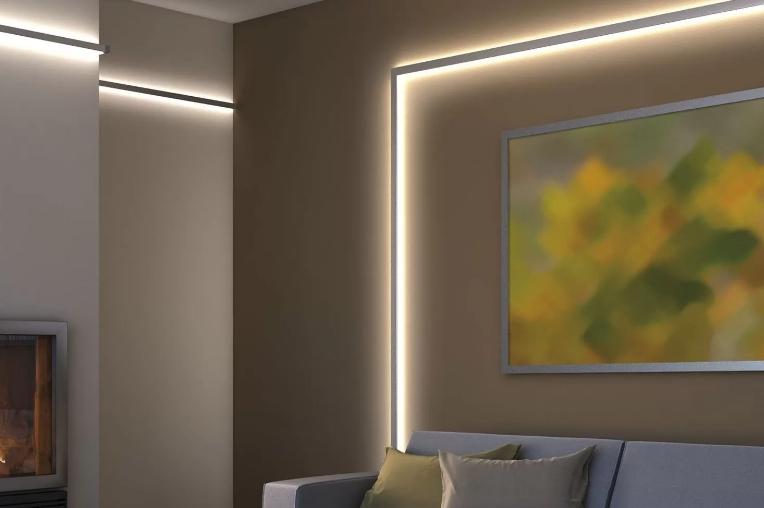
Concealed perimeter lighting
Carry out the work should take into account several recommendations:
- Order a ceiling made of translucent fabric, well transmitted light. Companies have special options, you only need to determine the color.
- Specify the level at which the canvas will be stretched. On this basis, choose a line of installation and mark it on the walls, marks will still be hidden later.
- To think about the location of power units and controllers. Since you can put pieces no longer than 5 meters, usually you need 2 or more segments. All controls and power supply are required to be located outside the ceiling, as they last less than the tape and you will have to remove the canvas when replacing it. You can solder wires of suitable length for power supply.
- Glue the tape with double-sided adhesive tape of high strength, such sells in car dealers. Check the functionality in advance so that there are no questions.
- After tensioning the strip, turn on the backlight and adjust the brightness and mode, if possible.
In the same way, you can place the LED strip on the surface of the ceiling to create different effects. In this case, it is important to ensure a secure attachment, so you can use mounting adhesive.
Directional
If you want to highlight the window openings, you can use LED lighting. It should be remembered that the temperature and humidity differences near the window may be greater than in the room, so it is necessary:
- Consider where to install the tape. It should be placed so as to highlight the opening, but at the same time not to create discomfort to the vision and not to give reflections into the room. Make marks on the slopes so as not to make a mistake during installation.
- Choose an aluminum profile with a diffuser, in which the light will be installed. It should be cut in advance at an angle of 45 degrees, to dock at the corners perfectly straight. It is easiest to do with a hacksaw for metal.
- Secure the profile with liquid nails or dowels. In the second case, you need to drill holes for screws and choose countersunk holes to make their heads flush with the surface.
- Select the location of the power supply and controller so that they are not visible. For example, you can glue them to a double-sided adhesive tape on the underside of the window sill. Connect the ribbon to the other elements with the connector or solder the contacts.
- Carefully glue the strip inside the profile and cover it with the diffuser. Check the work.
It is not uncommon to make Backlighting for a niche under curtains against the window. In this case, it is also desirable to use an aluminum profile that diffuses light.
Spot

This option is known to many under the name "starry sky" and it is much easier to make than it seems at first glance. You can assemble the system on your own, if you follow the simple instructions:
- Before installing a stretch ceiling, you must first Install LED strip. It can be arranged along the perimeter, using an aluminum corner or in several rows along the surface. It is better to use a profile with a diffuser, so that the light is uniform.
- Fasten the elements securely, it is best to use dowel nails, as over many years, double-sided tape will lose its properties. You can also use modern adhesives. When connecting, remember that the power supply and controller must be outside the ceiling.
- Order opaque canvas, so that the LED strip does not give reflections, it is important to get the desired effect. You can choose options that transmit light slightly.
- After installing the ceiling will need pins Starpins. These are special elements of small thickness, with which you can achieve a starry sky effect. Use a needle to make holes in the canvas and insert the pins into them. It is safe for the ceiling, it will last as long. Arrange the pins randomly or create a map of a section of the starry sky with some constellations.
You can add pins later if the effect is not enough. They hold well in the material without any fixation.
How to change the LED strip under a suspended ceiling
If the lighting, located above the canvas, stopped working, you need to find out the reason and make repairs. There may be several options:
- First of all, check the power supply. Usually if it burns out, there is a characteristic smell. But to be sure, it is better to put another one. If even with it the light did not appear, then it is not in the power supply.
- Check the operability of the controller, it most often breaks in such systems. Solve the problem by replacing it.
- If the tape does not work, you will have to remove the canvas, otherwise you can not get to the ceiling. To do this, you need to call a handyman to heat the ceiling and remove it from the profiles.
- Prepare a replacement tape in advance, so you can quickly do the work and pull the ceiling back on.
It is not difficult to make stretch ceiling illumination, if you choose the right option and follow the instructions. The main thing - to buy quality components and when assembling do everything according to the scheme.