Making a pass-through switch from a conventional one yourself
In electrical stores, there are on sale switches, called through-breakers or marching switches. Externally, they do not differ much from conventional key light switches. Not everyone knows that they can be used to assemble lighting control circuits that can be used to turn lights on and off from two (or more) points. This may be needed in long aisles, large rooms with multiple exits, and other situations.
The difference between a walk-through switch and a conventional one
A walk-through switch consists of the same assemblies as a conventional switch:
- bases;
- Connecting terminals (terminals);
- movable system;
- contact group;
- Decorative parts: a key (there can be several) and a frame.
The difference lies in the design of the contact group. A normal key switch contains one movable contact and one fixed contact. In one position the circuit is closed, in another position it is open. The contact unit has a change-over contact group and consists of two fixed and one movable (change-over) contacts. In one position one circuit is closed (the other is open), in the other position it is vice versa. The second circuit is assembled, the second circuit is open. Therefore, such devices are rightfully called switches.

It is not always possible to distinguish the marching switch from the key device by sight - not all manufacturers bother to put markings in the form of a double arrow or staircase on the front panel. Therefore, you can determine the type of switch from the back. A walk-through switch has at least three terminals, and there is a diagram of the contact group on the back.

Some manufacturers, instead of a diagram, put the letter designation of the terminals on the back of the switch. One option: the change-over contact is marked with the letter L, the fixed contacts A1 and A2. Other versions of the marking are also possible, there is no unified standard for the designation, though the letter designation is becoming rarer.
| Switch type | Number of keys | Terminal marking |
|---|---|---|
| Legrand Valena | 1 | Scheme |
| Lezard | 2 | Scheme |
| Makel Mimoza | 2 | Diagram |
| Champagne Simon | 2 | Letters |
Like conventional keypads, the daisy switches are available as single and two-key (rarely three-key). In each case, they control the appropriate number of contact groups.
Making your own walk-through switch
Walk-through switches are available and easy to buy. But in some cases, you may need to make a walk-through switch from a conventional one. The easiest way is to use two key single-key devices..

The input terminals have to be connected with an external conductor. The first disadvantage of this method - you have to manipulate two keys, each time they have to be installed in the opposite direction. The second - you will need to arrange two places to install appliances. You can get rid of the second by using a two-key switch. But to turn the light on and off, you have to put both keys in opposite positions.

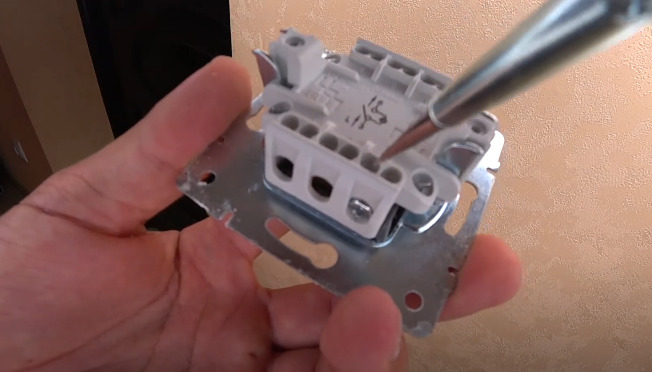
The easiest way to fully convert an ordinary dual switch into a marching switch is if the contacts have a separate input. To make the conversion, you have to get to the contact groups and flip one movable contact.

But most double switches have a different design - with united input. In this case, the rework is more complicated.

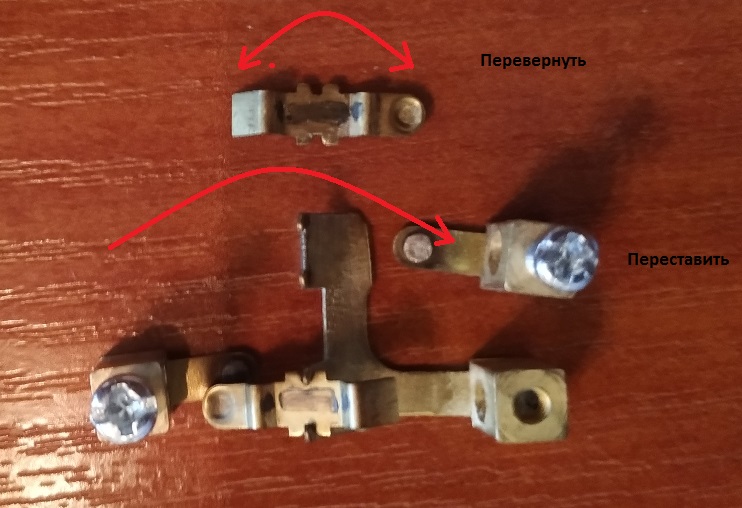
Just flip the changeover contact will not work - interfere with the long bar. It will have to be cut (you can use metal scissors, etc.). To do this, you must remove the entire contact system.

After that, you have to turn the movable contact 180 degrees. Since the contact pad will now be on the other side, the fixed contact will also need to be repositioned.
The contact system can then be assembled, put in place, and the appliance fully assembled.

Different manufacturers' devices may have different designs, limited only by the engineering flight of fancy. For switches made by other manufacturers, modifications may be made in a different way (instead of cutting the busbar, it may be necessary to increase the busbar, etc.). In each case, it is necessary to look at the site.
After that, the two keys must be mechanically connected. This can be done with glue. If there is a suitable donor single key, you can get a single key from it. You will get a full-fledged marching switch.

Using a pass-through device instead of a conventional one
The marshalling switch can be used as a normal key switch. In this case only two contacts are involved - one movable and one stationary.

The second fixed contact is not connected anywhere. This arrangement completely replaces the conventional device. In terms of dimensions, in most cases, it is also a complete match. But a marching switch is more expensive than a key switch, so such a replacement only makes sense when a simple key device is not at hand. The idea of making a switch from a marching switch on purpose is financially unsustainable.
How to connect a walk-through switch
To assemble a conventional marching switch control circuit, you will need two devices. One is installed at the beginning of the corridor (or at the entrance to the room or apartment), the second is installed at the end of the path (or at the end of the corridor). When analyzing the circuit, it becomes clear that it is possible to build or break a power circuit with either switch, regardless of which position the other switch is in.

Read also: How to wire a single-acting pass-through switch
For controlling from three or more places, you must add the appropriate number of crossover switches to the circuit. Theoretically, their number is unlimited.
For those who do not understand it, we recommend a video.
Peculiarities of marshalling devices
The principle of operation of the marching switches does not differ from the usual - in one position the light is on, in the other off. The difference of the marching device is that its position is indefinite. With the same state of the key, the light can be on or off - depending on the state of the other switch. Therefore, it is more difficult to equip them with a chain of backlighting and indication - the usual principle of de-coupling does not work well here. This is why it is more difficult to buy a backlit marching switch, and the circuitry of the additional chain is done differently.

Making a pass-through switch from a conventional one is not too difficult. Knowing the principle of operation and structure of such a device, it is possible to make it from an ordinary one. But disassembling, reassembling and remaking the device does not increase its life, so if possible, you should buy a factory-made switch, and remaking is worth doing only if there is no other way out.