How to repair a table lamp
The original design solution of a table lamp often determines its price and popularity on the market. Everyone wants the selected product to serve reliably and for a long time. However, technology is technology, sooner or later there may be a breakdown and you have to think about how to fix the lamp.
In such cases, it is not necessary to carry the lamp to a workshop. If you have at least a school concept of electrical engineering and the ability to hold a screwdriver with pliers, most of the faults can be identified and repaired yourself at home. In this article we will tell you how to do it.
Before we proceed to repair
If the table lamp is broken - the first thing to do is to disconnect it from the power supply, remove the plug from the socket. All repairs, including inspection, should be carried out on a completely disconnected from the mains lamp. After all, in the case of a breakdown of the insulation bare wires can contact with the metal elements of the lamp housing, and you will get an electric shock when you touch it.
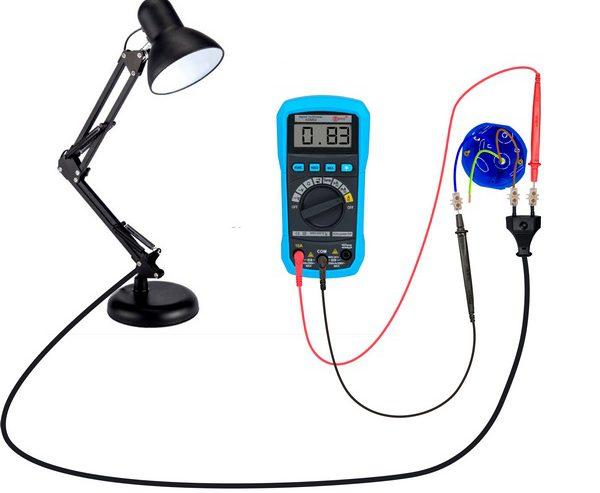
Do not touch the metal parts of the lamp immediately after disconnecting it, it is not safe. The capacitors retain a static charge for some time, and if the insulation is disturbed, the product case may be energized. It is necessary to wait until the capacitors are discharged! Check the absence of current on the switched off lamp with a voltmeter, and only after that you can proceed to repair.

If you use an incandescent lamp in your lamp, it is important to remember that during operation it heats up and can heat the nearby elements, including the metal lamp shade. Wait for the lamp to cool down to prevent burns from touching it.
For this reason, table lamps do not use bulbs over 60 watts.
Handle the bulb with care when unscrewing it, it may crack in your hands. You should not screw the bulb into the socket too tight - to unscrew it after prolonged use in high temperatures will be difficult, it often ends in the breakage of the socket.
Read also: How to repair the LED light bulb at home
What to do if the lamp does not turn on
It happens that the lamp has stopped turning on. Or a new light bulb does not light up. The reasons are mainly the following:
- The bulb itself is defective;
- There is no contact in the socket;
- A faulty switch;
- Breakage of the contact in the wires.
The first thing to do Check the new bulb for proper operation. The easiest way is to screw it into another lamp, which you know for sure that it works. If it doesn't work there either, the bulb is the cause.
If the lamp is okay, you need to check the integrity of electrical wiring and the presence of current on the input and output contacts of all elements of the lamp from socket to bulb. According to the specifications, all 220V table lamps must be equipped with switches for safety reasons. It is forbidden to plug them directly into the socket. So, check the conductivity of the connections one by one on the plug, the switch and the socket.
Specialists call this operation "testing" the system and when searching for a breakdown do it in reverse order - from the light bulb to the plug. Use an electric tester for this - a device for determining the voltage in the network.
Checking and repairing the socket
We test the contacts of the cartridge. If there is current on them, but the bulb does not light up, the problem is in the socket. Often it happens that the quality repair of table lamp is limited to stripping the contacts of the socket fine-grained sandpaper.
It may be that the central or side socket contacts have sagged and do not contact the bulb, do not touch its base. Then you need to bend them with a screwdriver. If the contacts are burned, chipped or corroded, you will have to replace the socket. It must also be replaced if the metal threads are damaged or shorted to the housing.
Video: It's all in the socket!
Checking the switch
If the socket is good, test the contacts of the switch. It can also be tested without disassembly - with the wires connected to it. If there is voltage at the input and no voltage at the output, it means that there is a break in the circuit inside the switch body.
Switches come in pushbuttons and pushbuttons, built into the wiring or into the case, but always of delicate and delicate construction. It is often difficult to disassemble them, and even more difficult to troubleshoot, so a tip: if it breaks, it is better to replace it with a new one.
Recommended for viewing: How to wiring a switch intelligently.
Broken contact in the wiring
Table lamp can stop turning on in case of breaks and fractures in the wires, which are often accompanied by a short circuit. Sometimes the wire breaks at the terminal block fasteners at the base of the plug, switch, or socket. The light bulb then either goes out completely or flashes randomly. The wire may spark at the break and a crackling sound is heard.
Look for the location of the damage by visually inspecting and groping the entire length of the wire. It is not difficult to repair the wire - you need to carefully strip, solder and insulate the broken ends.
But it is better to simply replace the damaged section. However, you should remember the rule - if you have to replace a flexible power cord, then only with a uniform and with the same or larger cross-section. Otherwise, overheating and ignition of the cord is possible.
Useful to read: Repairing table lamps
If you need to repair a clothespin light fixture, you should take special care to examine the integrity of the wiring and all elements of the device. Over time, the attachment of the lamp becomes loose, it happens that it falls and gets damaged.
The simplest electrical scheme
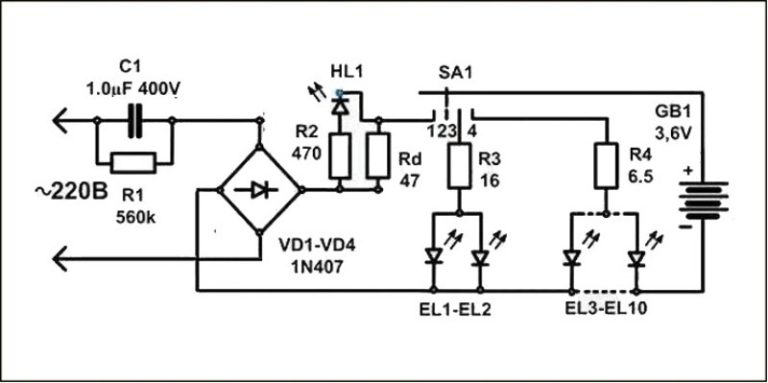
To repair lighting fixtures, you need to know at least the general principles of construction of electrical circuits. Modern light fixtures are equipped with many additional electronic mechanisms and have a variety of functionalities. However, the principle of connecting the lighting fixture (bulb) almost always remains the same.

The figure shows diagrams of different types of lamps with multiple light sources, but they are also typical for table lamps.
An important feature, especially for tabletop models - the ability to adjust the brightness and intensity of the light. It is such devices have widespread use for students, creative workers and in the electronic industry on the assembly of small parts and precise mechanisms. In such models, the circuitry is somewhat more complex and includes additional elements for adjusting the light.

How to disassemble a table lamp
Algorithm of actions when disassembling a table lamp:
- Remove the plug of the device from the socket.
- Unscrew the bulb.
- Remove the lamp shade. To do this, slide the corrugated casing of the lamp stand. Under it there are screws fixing the lampshade, unscrew them.
- Remove the socket.

We check the operation and repair the elements of the lamp - the socket, the switch and the wires, as described above.
Sometimes it is not possible to unscrew the bulb from the socket. This happens when the base is corroded and firmly seized in the threaded connection socket or the central contact soldered to the base. You need to wrap a thick rag around the bulb and try to unscrew it. Often the bulb breaks, leaving the base in the socket. It can be easily unscrewed by catching the edges with pliers.

Electrical wires can be attached to the contacts of the socket by clamps or soldering. In the first case of repair, the stripped wire ends are inserted into the clamps and carefully tightened. If the wires were soldered into a socket, it is better to replace such a socket with a model with screw clamps in case of repair.

Connect the wires can be twisted by pigtail, but it is better to use soldering. The joints should be insulated. Then you carefully put the wires in their places and assemble the lamp.