How to hang a light fixture with a switch on the wall
Installation of a wall lamp is within the power of even those who are not very well versed in electricity and do not perform complex work. Installation will require a set of tools and knowledge of the basic fundamentals of wiring electrical equipment. The main thing is to comply with all safety requirements and follow the simple recommendations outlined in the overview.

Preparing
First of all, you need to prepare for the work and take into account the factors that affect the reliability of installation and the quality of lighting. It should be understood that wall models more often act as an additional source of light and allow you to highlight a separate area or create a comfortable environment for reading, crafts, etc. Also, sconces can be used to illuminate the working area or dining table in the kitchen, as highlighting of the dressing room area, etc. It is important to consider a number of parameters:

- Purpose of use. The characteristics are chosen depending on what the luminaire will be used for. It is necessary to carefully select the power so that the light is sufficient. If you need to highlight a part of the interior or direct the light flux to a certain place, it is better to choose an adjustable model in which plafond can be rotated and adjusted perfectly accurately.
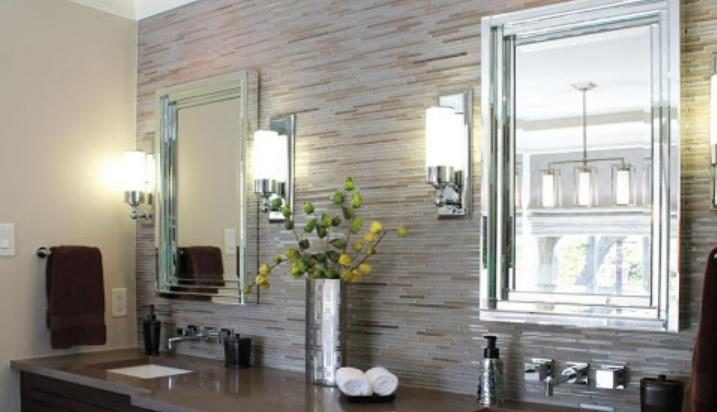
- Height of location. The standard range - from 100 to 150 cm, as most often the wall light illuminates the sitting area or is located above the bed. But in hallways and on loggias, it is better to place sconces higher, so as not to interfere with movement. Another important point - a person must reach for the switch without getting up from his seat.
- Interior design. Select the model of lamp should be under the environment, so it blends both in color and style. Think about whether the chosen place in terms of design, whether the lamp will not look alien.
- Type of switch. Most often use models with a rope or key switch. Functionality does not depend on this, proceed from the convenience and your own wishes. Another solution - lights with a plug, which are included in the socket. Because of the dangling cord, the appearance is not the best, it is worth hanging only where sconces are rarely used.
- Place of installation. Take into account the strength of the wall, because it is necessary to fix the equipment, as well as pre-wire it, so as not to spoil the surface later. Depending on the base select fasteners, there are many options, it is not difficult to find a suitable solution for any material.
- Type of bulbs. You should not use traditional incandescent bulbsThey heat up a lot, consume a lot of energy and give a dim light. Halogen and fluorescent are an order of magnitude better. But the best would be LED equipment, its resource is many times greater than that of analogues, the quality of light is high, and the power consumption is the lowest.
- External conditions. If the humidity and temperature vary in the room (bathroom, loggia, kitchen), it is worth to hang a model with increased protection from adverse conditions. Indication of this is on the packaging or in the installation and operation manual. Luminaires with protection splash-proof light fixtures are labeled IP44.
Note! If the lamp is located where it is inconvenient to turn on and off, it is better to buy a model with a remote. Then you can control from anywhere in the room.
Wiring diagram, what tools will be needed
To install wall lights, you need to study the instructions that come with the sconces. To understand how to connect the wires correctly, so as not to mix up anything and connect the lamp correctly. It is necessary to prepare a set of tools:
- Level to mark the holes for fixing, if the plate is used.
- A perforator for concrete, brick and aerated concrete surfaces. For wooden walls, an electric drill or screwdriver is enough.
- A set of screwdrivers.
- A small knife.
- Duct tape. If a special connector will be used, it is not necessary to insulate anything.
- Fasteners for the lamp. Most often, the kit includes dowels, but they are unreliable, it is worth using a better option.
In some cases, additional tools may be needed, so you need to think about this point in advance.
Recommended to view: Instructions for connecting wall sconces.
How to assemble a wall sconce with a cord switch
In this case, you have to install the light fixture taking into account the number of wires. There can be two or three, so depending on the model, choose the right item to properly connect a wall sconce with a cord switch:
- If there are two wires, the zero should go directly and the phase through a switch (or to the appropriate terminal if the cord is placed in the lamp housing). If there are several bulbs, the wires will go from each one. In this case, connect the contacts using a pad or make a twist and carefully wrap it with duct tape.
- When there are three wires (there is a wire for grounding), then connect according to the markings that are always on the contacts of the lamp. L - phase, N - zero and PE - ground. If there are no letter designations, there must be a description of the color of the insulation in the manual.

To connect the lamp, you need to follow the hints of the manual, there is always a diagram and designations of wires. Be guided by it, as the standards in different countries are different.
Model with a key
The traditional solution with a switch on the wall is suitable if several sconces are installed or the lamp is located in an awkward place. In this case you should connect the equipment according to a simple scheme:
- Ground and zero from the junction box lead directly to the sconces and connect in any convenient way. The main thing is to ensure safety. It is easiest to use modern connectors on the latches.
- The phase must be led into the switch and fixed to the contact. Then it must be pulled to the light fixture. You get a circuit, which closes and opens the key. It is possible to connect more than one fixture, if necessary.

Tip! If all the wires in the Chinese lamp are in the same color insulation, it is better to mark them with pieces of colored duct tape, so as not to confuse anything.
Marking the place and preparing for installation
Before you begin, you need to bring the wire up. This is done during the repair, because you have to screw in the wall, lay the cable, then putty and level the surface. In an extreme case, you can lay the wire on top, using the cable-channel, but it does not look very neat and can interfere with the fixing of the structure. As for the preparation of the place, it is worth following a simple instruction:

- Unpack the light fixture, find the fixing element. Most often this is a plate with two holes through which screws or other fasteners are inserted. Fixing the sconces is done by two protrusions or screws, which are inserted into the fastening pad on the base and pressed with nuts. There may be other options, but they are rare. It is also worth specifying how the bracket should be positioned - vertically or horizontally (more often the second option).
- Select the height of the location, apply the design to make sure that the plafond is where it should be, not shifted up or down in relation to the mounting pad. If necessary, corrections can be made, which are easy to do at this stage.
- Using a level to draw a clear horizontal or vertical line, which will be a reference point. Installing the sconces by eye is not the best solution, as you will not be able to correct the position later. Do not draw too long a line, so that after fixing it will not be visible on the sides.
- Then place the plate so that the holes are aligned along the line. Make the marks with any object at hand. Make sure that the wire is approximately in the middle.
- On the perforator is set a drill or drill on the concrete, which by diameter corresponds to the selected dowels. Work with the tool carefully, always making sure that the drill comes in horizontally. When drilling, gently suction the dust with a vacuum cleaner pipe, then there will be almost no dust.
- Check the depth of the holes and make sure that it is slightly longer than the length of the dowel. If necessary, deepen more.

For your information! To know exactly how deep to drill and not to go very deep, you can glue a piece of painter's tape on the drill as a guide.
Ways to attach the lamp to the wall
There are several mounting options. When choosing, it is worth taking into account the material from which the wall is made, its features and strength. There are fasteners for all structures, it is worth choosing a specific solution for mounting the lamp on the wall, taking into account the recommendations:
- For wooden walls, self-tapping screws are suitable, dowels are not required in this case. Select the length based on the weight of the lamp, usually 30-40 mm is enough. If the upper part of the wall is covered with plasterboard or other material, use options from 50 mm or more.
- For foam concrete, choose special dowels with screw projections on the perimeter. They fit well into the material and do not twist in it when the fastener is screwed. You can also use variants with so-called "tendrils" that hold well in loose surfaces.
- Under brick and concrete, standard products are suitable, because the surface is very hard and the dowels do not turn even if there are small protrusions. In this case, do not take a fastener longer than 40 mm, so as not to drill deep.
- For drywall and hollow structures, two types of fasteners are suitable - the so-called "Butterfly" and "Driva" (they are also called self-drilling plugs). It is not difficult to use, the main thing is to drill a hole of suitable diameter, it should not be too small or large.
- If the wall is very fragile or a large piece broke off during drilling, you will need a chemical anchor. This is a special compound, with which you need to fill the void. After drying, self-tapping screws are screwed into the surface.

Important! Using double-sided tape as a fastener is a bad idea. It dries out over time and the bra can fall on your head.
Installation process, step-by-step description
Before you begin, be sure to turn off the power at the switchboard or meter. Check the voltage with a tester to eliminate any risk. The work should be done in the daytime so that there is enough natural light, follow the instructions:
- Unpack the sconces, study the documentation, figure out how to mount correctly and whether the equipment needs to be disassembled before installation. Check the fasteners, if necessary, buy another one.
- Mark the wall and drill holes. Try on the dowels. Sometimes they can be loose, so it's best to choose a slightly thicker version to ensure a secure attachment.
- Attach the plate on which the wall sconce will be placed. Make sure it is positioned evenly and does not hang loose. Do not tighten the self-tapping screws all the way, just enough to hold the bracket firmly in place. If you overdo it, you can damage the dowel from the inside.
- Connect the contacts of the lamp to the wiring. Here it is better to involve a helper to hold the sconce. Since it is not yet fixed, it is not possible to hold it and connect it at the same time. The contacts must be secure, if you use a block - pull the ends of the wires all the way through and tighten the screw so as to avoid breaking the connection.
- Hang the lamp on the wall. To do this, align the base with the plate and tighten the nuts or click the tabs, it all depends on the model. Make sure that everything is held firmly and the sconce will not fall over time.
- Check the operation of the equipment. Above described how to assemble a sconce with a rope and switch. If everything is done correctly, there will be no problems with the lamp.

Install a wall lamp with your own hands is not difficult, if you understand its design and clearly understand how to connect the wires. It is important to choose reliable fasteners so that the bracket is held firmly, choose a place and lead the wiring in advance.