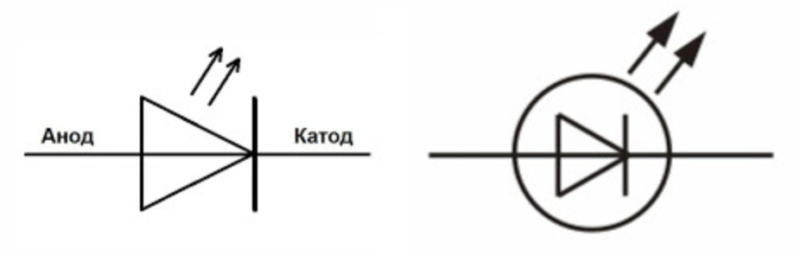
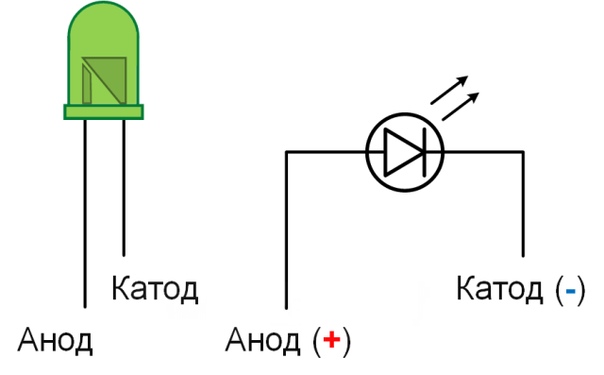
How to Determine the Cathode and Anode of an LED
Like any semiconductor device with one-way conductivity, the LED is critical to the correct DC circuit connection. For normal operation, the anode and cathode of the LED must be connected to the respective poles of the voltage source according to the circuit diagram. There are several ways to determine the pin assignment of a light-emitting element.
Determination with a multimeter
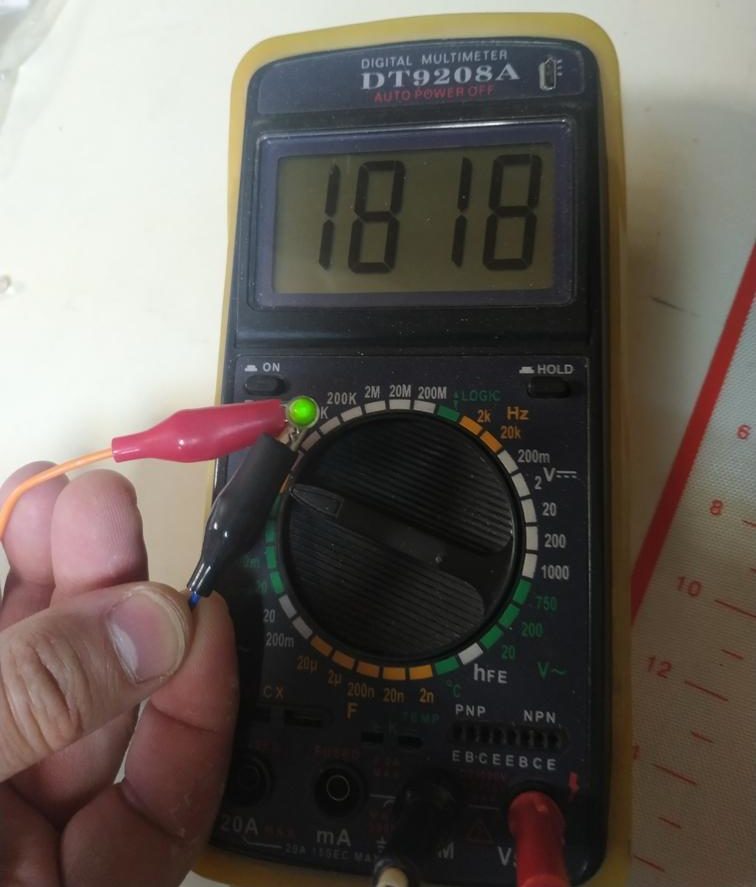
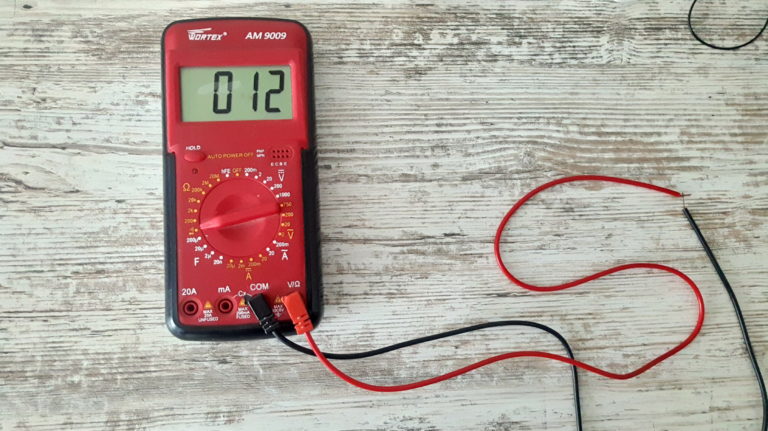
Like any diode based on a p-n junction, a light-emitting diode can be tested with a multimeter using its property of conducting current only in one direction. Modern digital testers have a special diode test mode where the measurement voltage is optimal for this procedure.
To determine the position of the LED pins, you need to connect its legs randomly to the styli of the multimeter and determine the result from the display.

If the element is connected incorrectly, the measurement will result in overloading the resistance value (OL - overload). It is necessary to swap the terminals of the multimeter.
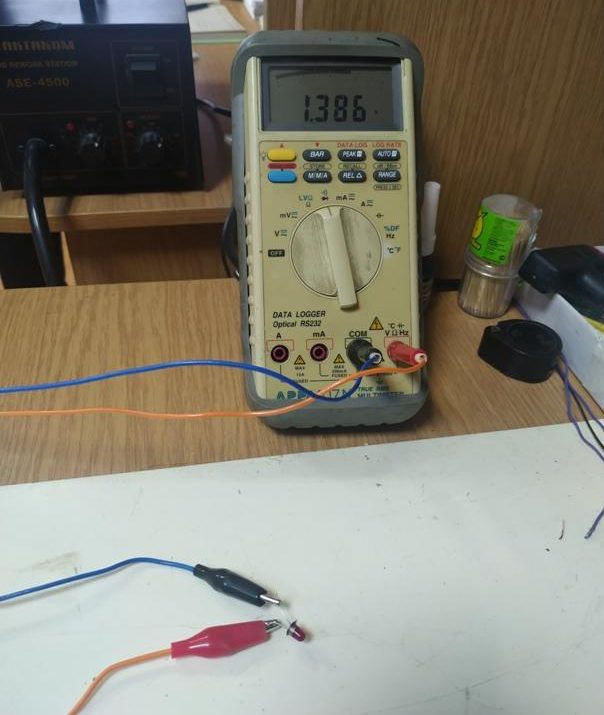
If the LED is good and connected correctly, some resistance will be indicated (the exact value depends on the type radiating element). In this case, the anode will be the lead connected to the plus of the multimeter (red wire) and the cathode to the minus (black wire).
Some testers in diode test mode output enough voltage to ignite the light-emitting element. In this case the correct connection can be checked by the glow.
If in both connection variants overload will be indicated on the display, it can mean:
- LED malfunction;
- the measurement voltage is not enough to open the p-n junction (the tester is designed to "test" silicon diodes, and most of the light-emitting elements are made on the basis of gallium arsenide).
In the first case, the semiconductor device can be recycled. In the second - to try another way.
The circuit of the LED by powering it up
The advantage of this method is that it can be used for light-emitting diodes with any parameters (voltage drop and nominal current). For this test, it is better to use a power supply with current limitation setting, or at least with its indication for monitoring. Otherwise it is possible to put the sensitive semiconductor device out of operation.
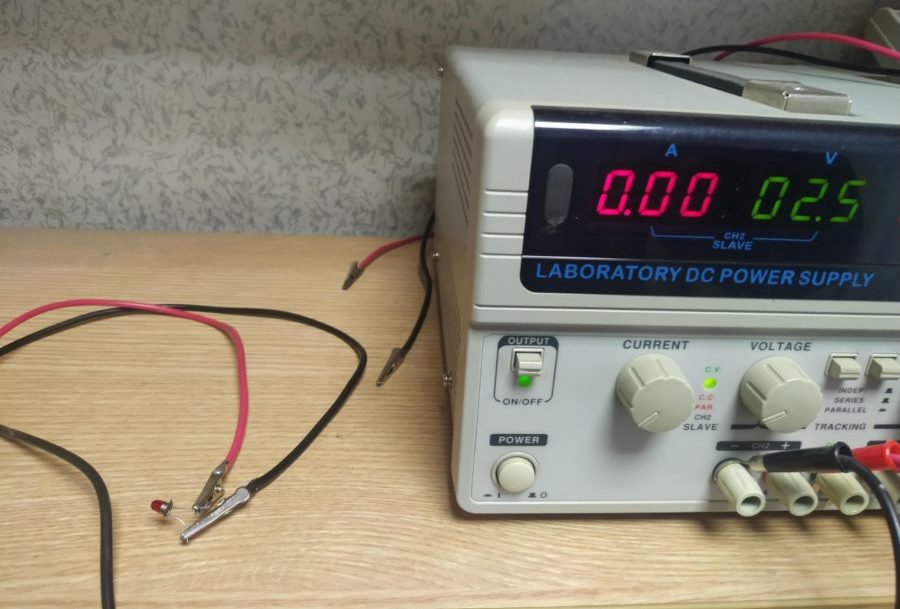
If there is an adjustable source, you should connect the LED randomly to its output and supply voltage, gradually increasing it from zero. It should not be higher than 2-3 V so that the element does not burn out. If it does not light up, you should remove the voltage and switch the outputs in the opposite way.
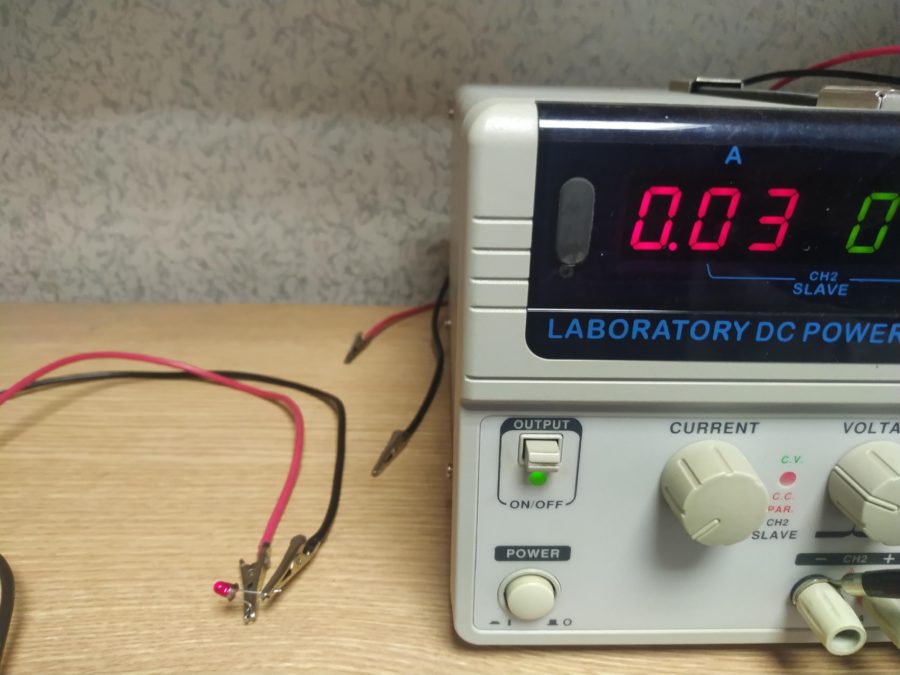
Gradually raising the voltage, you can visually determine the moment of LED ignition. In this case the plus side of the source is connected to the anode and the minus side to the anode of the emitting element.
If there is no regulated source, you can try to use an unregulated power supply with a voltage known to be higher than the supply voltage of the LED. In this case, test only through a 1-3 kOhm resistor connected in series with the semiconductor device.
If in both cases the LED does not light up, you can try to test with an increased voltage. If the element is faulty, it will not do any harm, and if it is designed for increased voltage, there will be a chance to know the correct pin assignment.
Recommended: How to know how many volts the LED
Using a battery
If there is no power source, you can try to determine the location of the pins from the galvanic cell, but you should keep in mind the peculiarities of such a test:
- the battery may not deliver enough voltage to open the p-n junction.
- household galvanic cells have low power, and the output current of the load is small - it depends on the initial power of the battery and on the residual charge.
The table shows the parameters of some domestic LEDs. Obviously, common half-volt chemical current sources will not be able to light any of the devices on the list.
| Device Type | Direct voltage drop, V | Operating current, mA |
|---|---|---|
| AL102A | 2,8 | 5 |
| AL307A | 2 | 10 |
| AL307B | 2,8 | 20 |
To increase the voltage, you can connect the batteries in series. To increase the power - in parallel (only for cells of the same voltage!). As a result you may get a cumbersome design, which does not guarantee the final result. Therefore, it is better to use this method in cases where there is no other way.
By appearance
Sometimes you can determine the polarity by appearance. Some types of LEDs have a key on the housing - a bulge or mark. To determine which pin is marked with the key, it is best to consult reference materials.
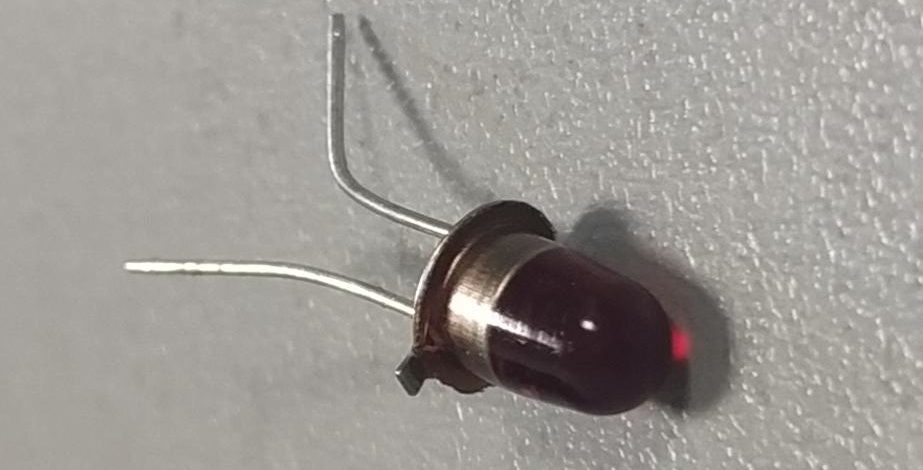
With frameless LEDs made in the USSR you can find out the pinout by looking at the internal structure of the device through a layer of compound. The cathode lead has a large area and is made in the form of a flag. This principle could have become a standard, but nowadays manufacturers do not strictly follow it, so this method is unreliable, especially for elements from an unknown manufacturer. Therefore, you can use this definition of the leads only for a preliminary orientation.
You can recognize the pin assignment of domestic LEDs by the length of the legs - the anode pin is made shorter. But this is true only for unused elements - when installing in place, the leads can be cut arbitrarily.
For clarity we recommend watching the video.
Using the datasheet
Other ways to determine the outputs can be found in the technical documentation of the elements - in reference books or online sources. At a minimum, you need to know the type of LED or its manufacturer. The documentation may contain information about the dimensions and pin-out of the device.
But even if this information is not found in the specification, the effort will not be wasted. The documentation can be a source of information about the limits of an electronic device. This knowledge will help you to choose the right mode of operation, as well as to prevent the failure of the LED when checking the pin assignment.
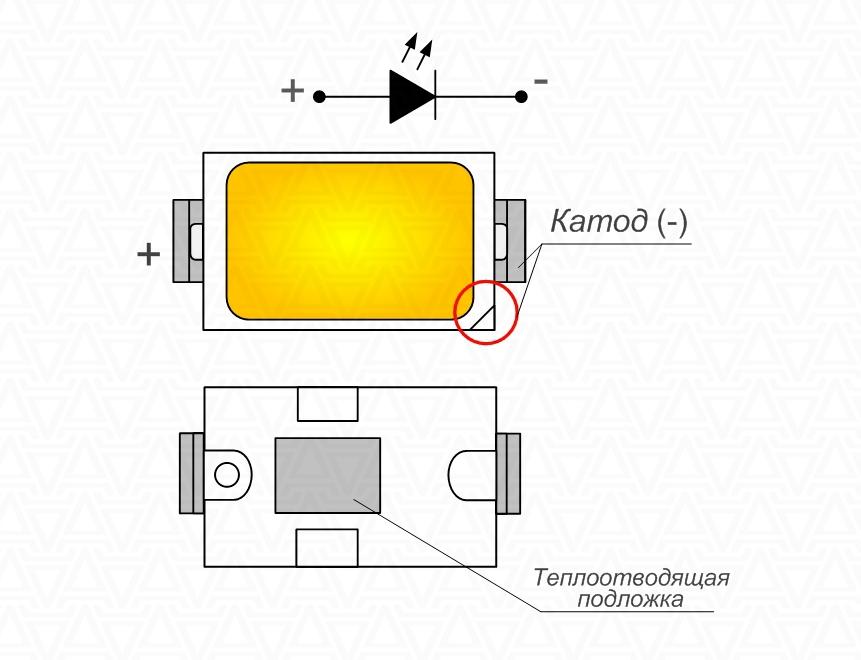
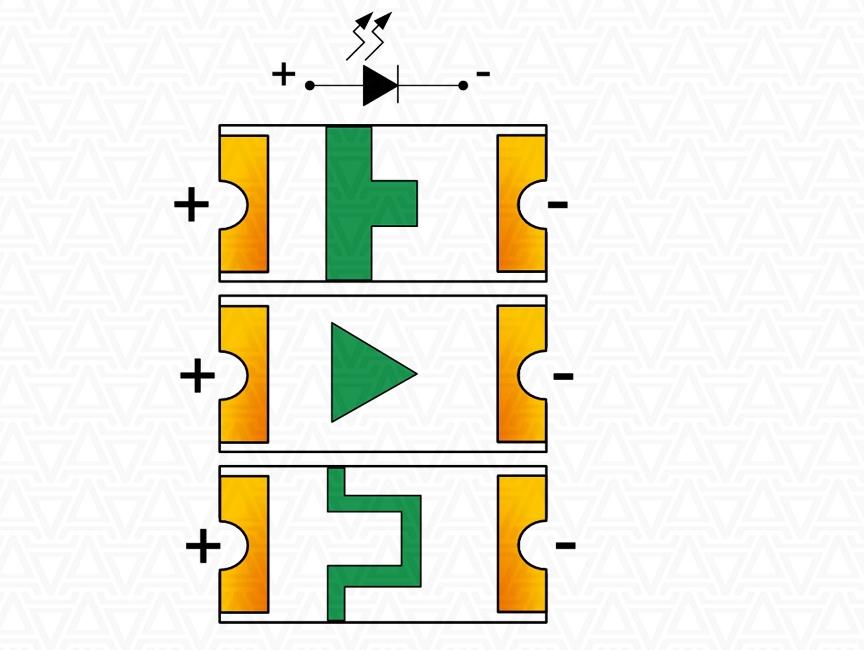
Polarity of SMD LEDs
Direct-to-board lead-free elements (SMD) are becoming more and more popular at the moment.SMD - surface mounted device). Such radio elements, unlike conventional ones, have advantages:
- There is no need to drill holes in the process of PCB manufacturing - the technology becomes cheaper and faster;
- electronic devices are smaller in size;
- The design of RF devices is simplified - the absence of leads minimizes parasitic interference.
But the desire for miniaturization has a downside - it is more difficult to identify the leads of an SMD LED. It is difficult to connect the probes of a tester or power supply to it. Therefore, it is important to put clear markings directly on the body of the element to avoid mounting errors. Such designation is performed in the form of a marking on the housing (a bevel or recess) or in the form of a mnemonic pattern.
And the simplest case is the inclusion of a light-emitting diode in an AC circuit. In this case, the polarity of the LED does not matter.