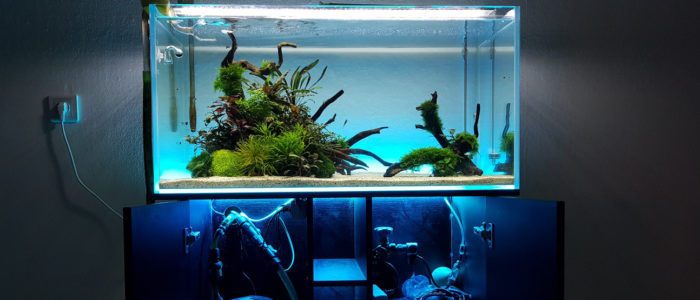
How to make an aquarium lighting with LED strip
There are many ways to make lighting for an aquariumBut not all of them will be correct and practical solutions for the proper development of its inhabitants. Excess or lack of light is equally detrimental to fish and plant life. LED strip for the aquarium has become the benchmark for solutions. When properly calculated, it emits the right amount of light and spectrum.
The specifics of lighting
Backlighting of the aquarium with an LED strip displaced its predecessors because of the superiority. Incandescent bulbs for every watt of power emit a luminous flux of no more than 20 lumens. LED strip gives more light, per 1 watt - 70-120 Lm.
The wide spectrum of LEDs creates an optimal environment for the aquarium inhabitants. We are interested in the red and blue spectrum. The blue light has a wavelength of 430 nanometers and the red has a wavelength of 650 nanometers - due to these values the photosynthesis process is going in the right way and the production of chlorophyll is higher than normal. Due to such conditions, plants and fish will feel well.

Main features
The angle of light scattering is 120 degrees, which means it will not affect unnecessary areas and the aquarium will be quite a nice piece of interior at night, as well as night lighting of the room.
The degree of protection of LEDs will also be pleased. You should opt for a protection class from IP65 to IP68. This is a fully dustproof strip that is resistant to direct splashes and water droplets - just the thing.
Choose an LED strip with a powerful light flux of 800-1700 Lm per meter, this will reduce the amount of tape installed and create optimal lighting. LED Strip installed simply. It is enough to tear off the sticker on the back side, as there will be a sticky plane.
If you want, you can install automatic sensors to turn on and off the backlighting. Convenient, modern and practical - your fish are always with the light. LED lighting has a long life, it is low voltage and safe.
Advantages:
- 25,000 or more hours of operation;
- No heat generation (no need for heat sinks and fans);
- Various colors;
- The equipment is low-voltage and safe;
- Minimum electricity consumption.
Disadvantages:
- Will have to work on the installation;
- The price of LED equipment is higher;
- Need a DC power supply.

Calculation methods
Consider the lighting on the example of the LED strip 5050 with the number of diodes 60 pcs/m: luminous flux of one meter - 1296 lumens (indicated on the package), power 14.4 W. So, dividing a meter of luminous flux power by the load consumed by this meter, we get:
1296/14,4=90 . It means that 1 watt of power consumption of the strip gives out a luminous flux of 90 lumens. Next, we determine the size of the aquarium, and at what height from the bottom of the aquarium the lamp will be located.
Let's assume that our aquarium has the following dimensions: width 1 meter, depth 0.3 m, height 0.6 m - that's 180 liters of water. It also has a lid. Brightness is measured in lux, for aquariums the brightness level is considered as follows:
- Low level - 15-25 lumens per liter;
- Medium level - 25-50 lumens per liter;
- High level - more than 50 lumens per liter.
The illuminance is calculated based on the light output and the illuminated
area: E(illuminance)=F(luminous flux strength)/S(base area of the aquarium).
In our case, 1296/(1mx0,3m)=4320 lux - taking into account the density of water and the fact that the beam of light is turned to 120 degrees. According to the table, this is enough to illuminate the average level of our volume and the maximum for a 100-litre aquarium.
We have considered an example of a standard aquarium, but the sizes are different, so use this example calculation. Don't forget about the red and blue spectrums, they also emit light, so one meter of such tape for 180 liters is enough and it will be bright.
The blue and red spectrums have less of the luminous fluxand are about 300 Lm and should be taken equally, one to one. In our case cut off 50 cm and mount side by side.
Video tutorial with a step-by-step description of how to install the light.
Installing the strip in the aquarium
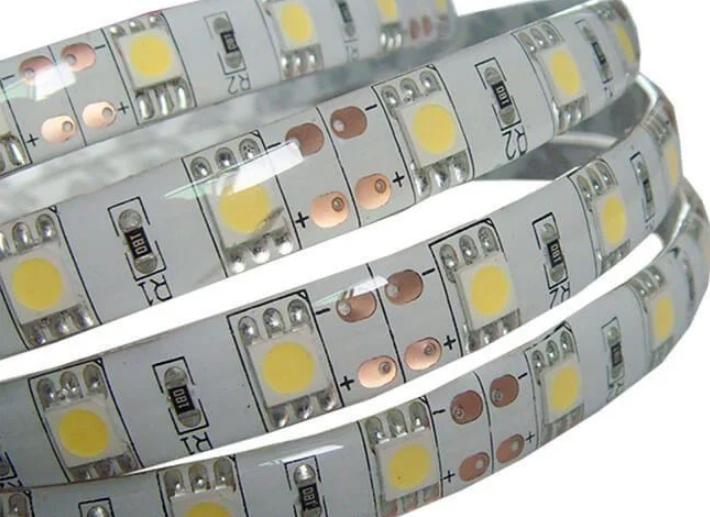
The LED strip is a coil of flexible strip, which cut Every 3-5 centimeters in specially marked places. The length of one coil reaches five meters. To do everything correctly, follow these instructions. So, let's refresh our memory a little bit. We will need an IP65 and IP68 LED strip, 2 wires with 0.75 meters cross section.2Soldering iron with solder (you can do without it, with connectors) power supply and optional diffusers. We leave you a useful link:
Video lesson - How to solder the LED strip.
An unusual and very interesting solution is the diffusers. Lay in it orange, pink or green LED strip, and at night include it as additional lighting, installed on the back wall of the aquarium. The diffuser is an enclosure, it can be intelligently applied, the choice is yours.

At the 200-liter aquarium we need about a meter of tape, you can slightly more (the exact calculation is given above, a rough - 1 watt strip power per 2 liters of water, ie, for a 100-liter aquarium 70 cm strip gives the effect of lighting medium-level) of white tape, blue and red - you can slightly less.
The easiest and most effective way is fixing LED strip under the cover of the aquarium. In this case, you do not need to invent anything, just install three strips for lighting at the main time and one for decoration separately. This is done as follows: remove the cover, wipe it dry and degrease it.
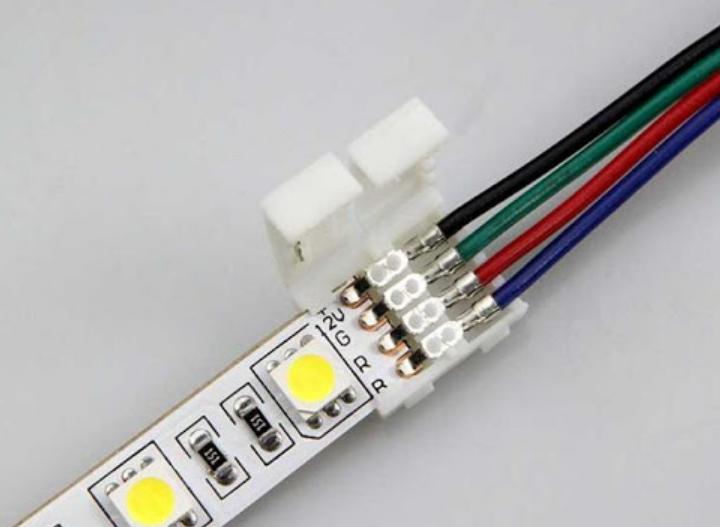
Connect the LED strips to the wires (see the video above), but not in series, and solder each section separately. Each strip is connected separately, and then lead one wire to the power supply.

Try to intelligently distribute the LEDs relative to the available space under the cover. After all, the more evenly they will be arranged, the higher will be the indicator of illumination. Feel free to experiment with the design of homemade pendant lights. The main thing is to calculate the amount of light you need and dare. For an example, let's see another variant of mounting the strip under the cover with a different configuration.

Tips
Try to buy the strip and power supply in one place. In this case you can check everything at once. The power supply is taken with a 20% power reserve. The power consumption per meter of tape is indicated on the package. Use moisture-proof tape.
Ask for electronic timers at the point of purchase. Their price is low and they allow you to program the time of turning on the aquarium lighting as you like.
LED lighting is not harmful to plants and fish, it is safe for humans. Feel free to experiment and delight yourself with new ideas for creating the right lighting.
If you do not have a cover on your aquarium, and you do not know how to make beautiful mounts for the diffusers, catch the link to a video on how to make a cover for the aquarium with your own hands.
Link to video (how to make a cover with your own hands).